
No Bake Mint Chocolate Chip Cheesecake (Grasshopper) Recipe
Introduction
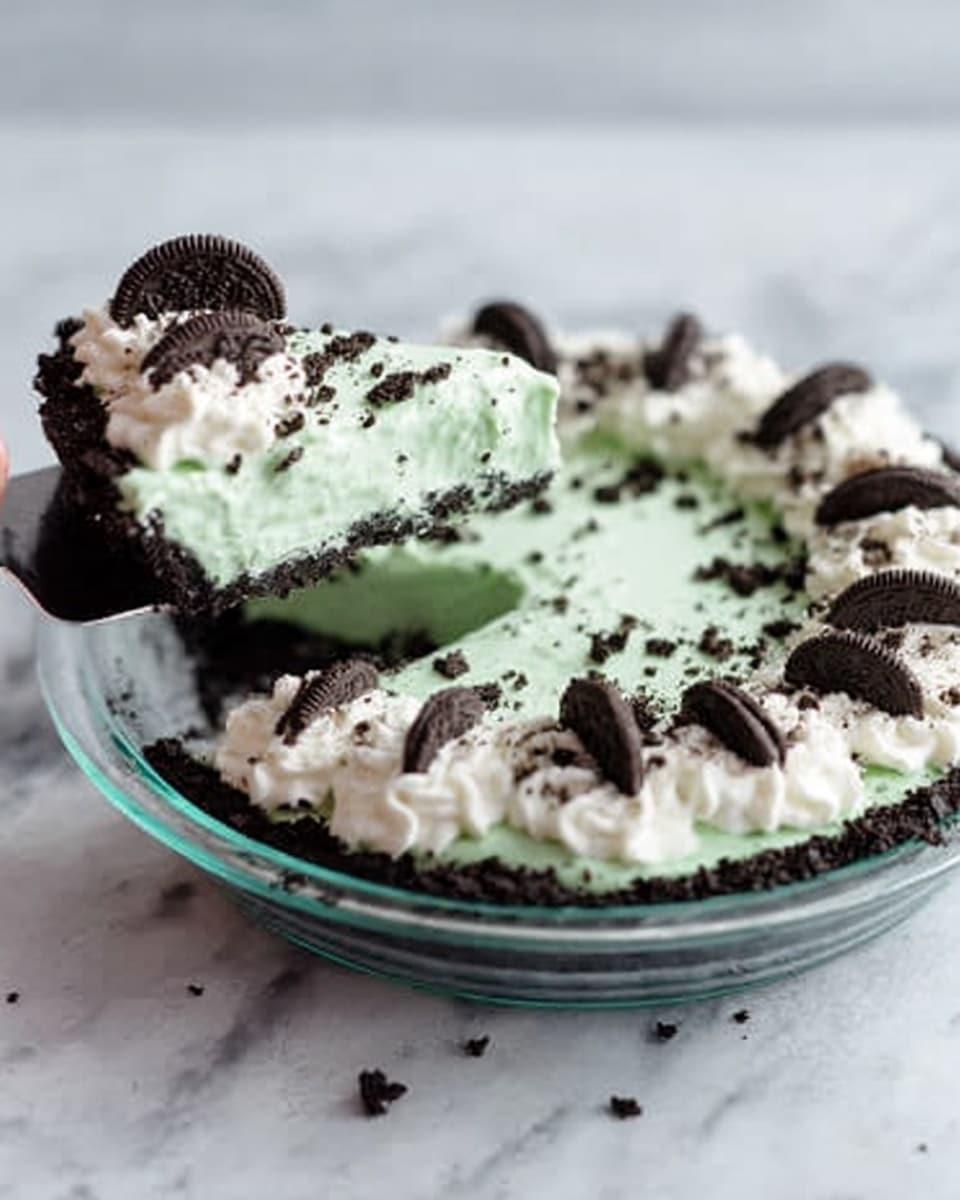
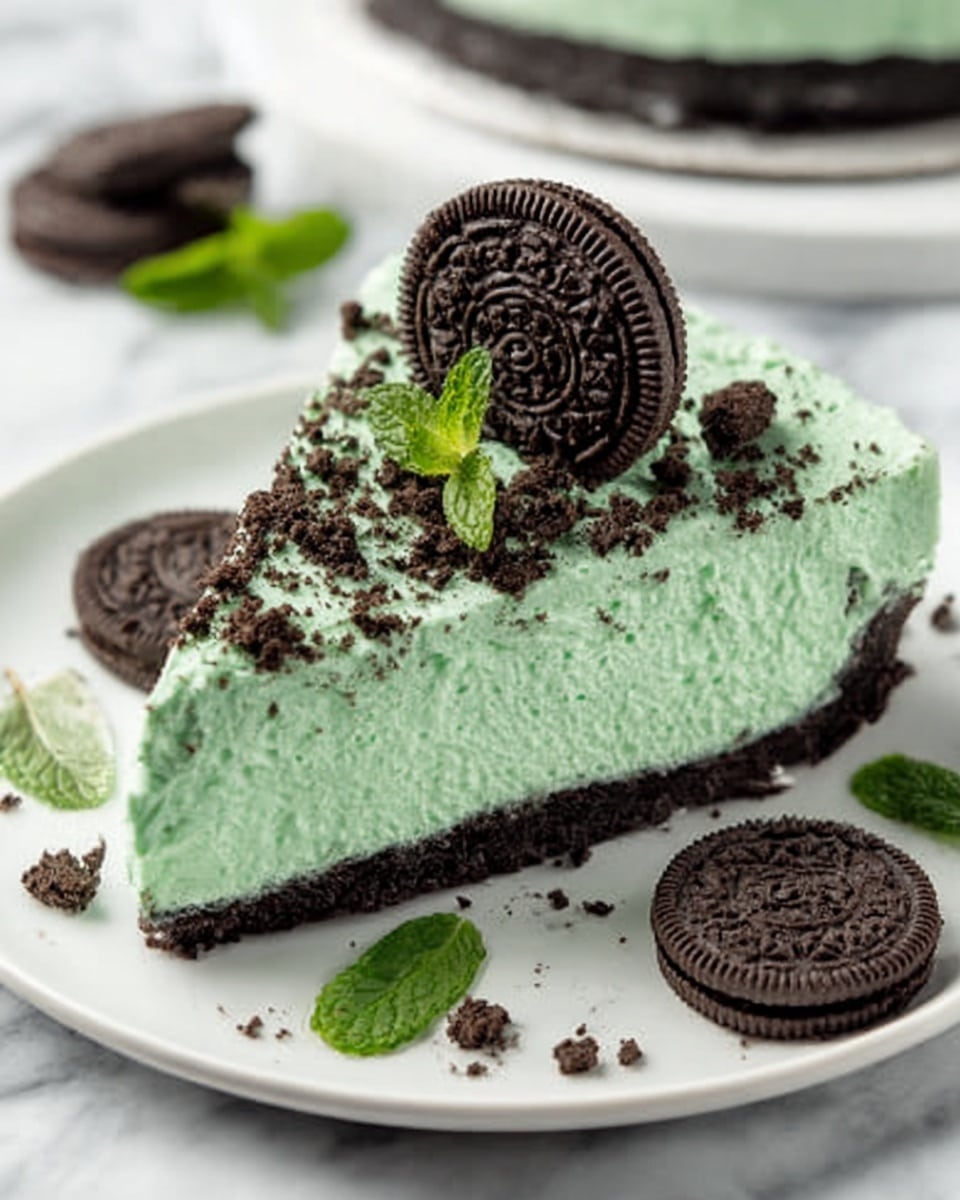
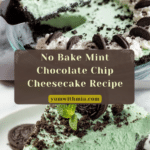
This No Bake Mint Chocolate Chip Cheesecake, also known as a Grasshopper cheesecake, is a cool and creamy dessert perfect for mint lovers. It combines a crunchy Oreo crust with a light, minty filling studded with mini chocolate chips for a refreshing treat.
Ingredients
- 30 Oreos
- 7 tablespoons unsalted butter, melted
- 24 ounces cream cheese, softened
- 1/2 cup granulated sugar
- 3/4 cup powdered sugar
- 1 teaspoon vanilla extract
- 1/4 teaspoon peppermint extract
- 1 ¼ cups heavy whipping cream
- Green gel food coloring (optional)
- 1/2 cup mini chocolate chips
Instructions
- Step 1: Place the Oreos in a food processor and process until they become fine crumbs. Drizzle the melted butter over the crumbs and stir to coat them evenly.
- Step 2: Press the crumb mixture firmly into the bottom and up the sides of a 9-inch springform pan. Use the bottom of a flat glass or measuring cup to pack the crust tightly. Freeze while preparing the filling.
- Step 3: In a large bowl, whip the softened cream cheese with an electric mixer until smooth. Add the granulated sugar and mix until combined.
- Step 4: Add powdered sugar, vanilla extract, and peppermint extract to the cream cheese mixture. Mix well and set aside.
- Step 5: In a separate bowl, whip the heavy cream to stiff peaks using an electric mixer. Be careful not to overwhip.
- Step 6: Gently fold the whipped cream into the cream cheese mixture until no streaks remain. Taste and add more peppermint extract if a stronger mint flavor is desired.
- Step 7: Add green gel food coloring a little at a time to reach your desired shade, then fold it in gently. Fold in the mini chocolate chips.
- Step 8: Spoon the filling into the prepared crust and smooth the top. Optionally, sprinkle extra mini chocolate chips on top.
- Step 9: Cover and refrigerate the cheesecake for at least 8 hours or overnight to set.
- Step 10: Remove the outer ring of the springform pan, slice, and serve as is or with your favorite toppings. Enjoy!
Tips & Variations
- For a stronger mint flavor, increase the peppermint extract gradually and taste as you go.
- If you prefer a different crust, graham crackers or chocolate wafer cookies work well as alternatives.
- Use white chocolate chips instead of mini chocolate chips for a sweeter twist.
- To make the cheesecake dairy-free, substitute cream cheese and heavy cream with plant-based alternatives.
- Adding a splash of crème de menthe to the filling can enhance the mint flavor and add a subtle boozy note.
Storage
Store the cheesecake in the refrigerator, covered tightly, for up to 4 days. For best texture and flavor, consume within this period. You can freeze individual slices wrapped well in plastic wrap and aluminum foil for up to 1 month. Thaw in the fridge before serving. Avoid reheating as this cheesecake is best enjoyed cold.
How to Serve
Serve this delicious recipe with your favorite sides.
FAQs
Can I make this cheesecake ahead of time?
Yes, this no bake cheesecake actually benefits from chilling overnight, which helps the flavors meld and the filling to set properly.
What can I use instead of Oreos for the crust?
Graham crackers or chocolate wafer cookies are great alternatives to Oreos and will yield a slightly different but delicious crust.
PrintNo Bake Mint Chocolate Chip Cheesecake (Grasshopper) Recipe

This No Bake Mint Chocolate Chip Cheesecake (Grasshopper) is a creamy, refreshing dessert featuring a chocolate Oreo crust and a minty, chocolate-studded filling. It’s perfect for mint lovers who want a simple, fuss-free cheesecake without turning on the oven. The vibrant green filling and mini chocolate chips make it visually appealing and delightfully flavorful.
- Prep Time: 20 minutes
- Cook Time: 0 minutes
- Total Time: 8 hours 20 minutes
- Yield: 12 servings 1x
- Category: Dessert
- Method: No-Cook
- Cuisine: American
- Diet: Vegetarian
Ingredients
Crust
- 30 Oreos
- 7 tablespoons unsalted butter, melted
Filling
- 24 ounces cream cheese, softened
- 1/2 cup granulated sugar
- 3/4 cup powdered sugar
- 1 teaspoon vanilla extract
- 1/4 teaspoon peppermint extract
- 1 1/4 cups heavy whipping cream
- Green gel food coloring (optional)
- 1/2 cup mini chocolate chips
Instructions
- Prepare the crust: Place the Oreos in a food processor and pulse until they become fine crumbs. Slowly drizzle in the melted butter and stir with a spoon to coat all crumbs evenly. Press this mixture firmly into the bottom and up the sides of a 9-inch springform pan, using the bottom of a flat glass or measuring cup to pack it tightly. Place the crust in the freezer while preparing the filling.
- Make the cream cheese mixture: In a large bowl, use an electric hand mixer or stand mixer with paddle attachment to whip the softened cream cheese until smooth. Add the granulated sugar and continue mixing until well combined. Then add the powdered sugar, vanilla extract, and peppermint extract, mixing again until smooth. Set aside.
- Whip the cream: In a separate medium bowl, whip the heavy cream to stiff peaks using an electric hand mixer. Be careful not to overwhip to avoid curdling.
- Combine mixtures and add flavor: Gently fold the whipped cream into the cream cheese mixture until fully incorporated with no streaks. Taste and add additional peppermint extract if a stronger mint flavor is desired. Add a few drops of green gel food coloring to achieve your preferred minty color and fold gently. Then fold in the mini chocolate chips.
- Assemble the cheesecake: Pour the filling evenly over the prepared Oreo crust, smoothing out the top with a spatula. Optionally, sprinkle extra mini chocolate chips on top.
- Chill to set: Cover the cheesecake and refrigerate for at least 8 hours or overnight to allow it to fully set.
- Serve: Remove the outer band of the springform pan, slice the cheesecake, and serve as is or with your favorite toppings. Enjoy!
Notes
- For a stronger mint flavor, increase peppermint extract to 1/2 teaspoon gradually.
- If you don’t have a food processor, place Oreos in a sealed bag and crush with a rolling pin.
- Use full-fat cream cheese and heavy cream for best texture and flavor.
- Green gel food coloring is optional but adds a classic mint-chocolate chip cheesecake look.
- Keep the cheesecake refrigerated until serving for best consistency.
- Mini chocolate chips can be substituted with regular chocolate chips chopped smaller.
Keywords: no bake cheesecake, mint chocolate chip cheesecake, grasshopper dessert, easy cheesecake recipe, no bake mint dessert, Oreo crust cheesecake
