
Red Chicken Enchiladas Recipe
Introduction
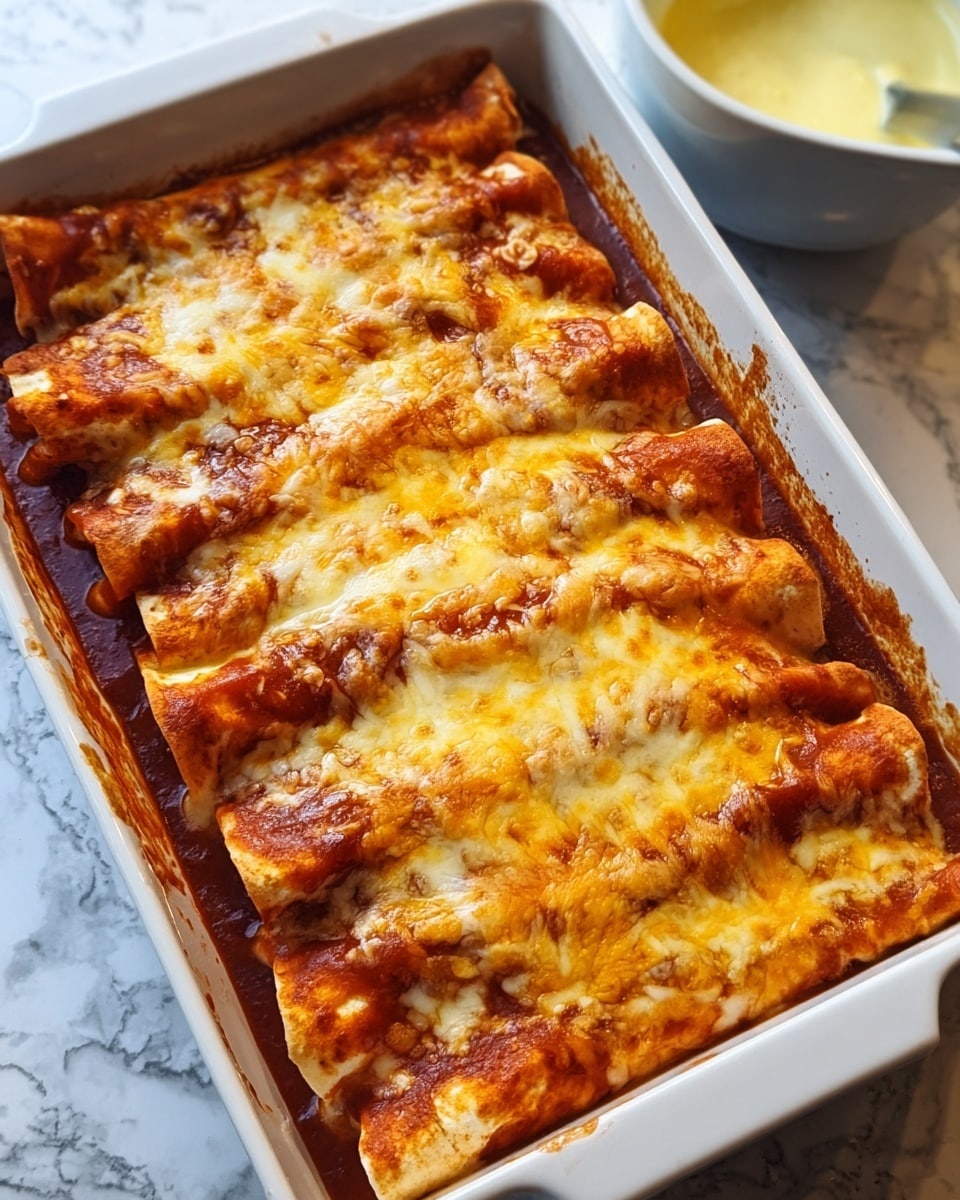
Red Chicken Enchiladas are a flavorful, comforting dish perfect for any night of the week. Tender chicken, black beans, and melty cheese wrapped in soft tortillas and baked in rich red enchilada sauce make for a crowd-pleasing meal everyone will love.
Ingredients
- 2 Tbsp avocado or olive oil
- 1 small white onion, diced
- 1½ lb boneless skinless chicken breasts, diced (~½-inch pieces)
- 1 4 oz can diced green chilies
- Salt and freshly cracked black pepper, to taste
- 1 15 oz can black beans, rinsed and drained
- 8 large flour tortillas
- 3 cups Mexican-blend shredded cheese
- 1 batch of red enchilada sauce
- Optional toppings: chopped cilantro, red onions, diced avocado, sour cream, crumbled cotija cheese
Instructions
- Step 1: Preheat your oven to 350°F (175°C) and prepare the red enchilada sauce while the oven heats up.
- Step 2: Heat the oil in a large skillet over medium-high heat. Add the diced onion and sauté for about 3 minutes until softened and fragrant.
- Step 3: Add the diced chicken breasts and canned green chilies to the skillet. Season with salt and freshly cracked black pepper. Cook for 6 to 8 minutes, stirring occasionally, until the chicken is cooked through.
- Step 4: Stir in the rinsed and drained black beans. Remove the skillet from heat and set aside.
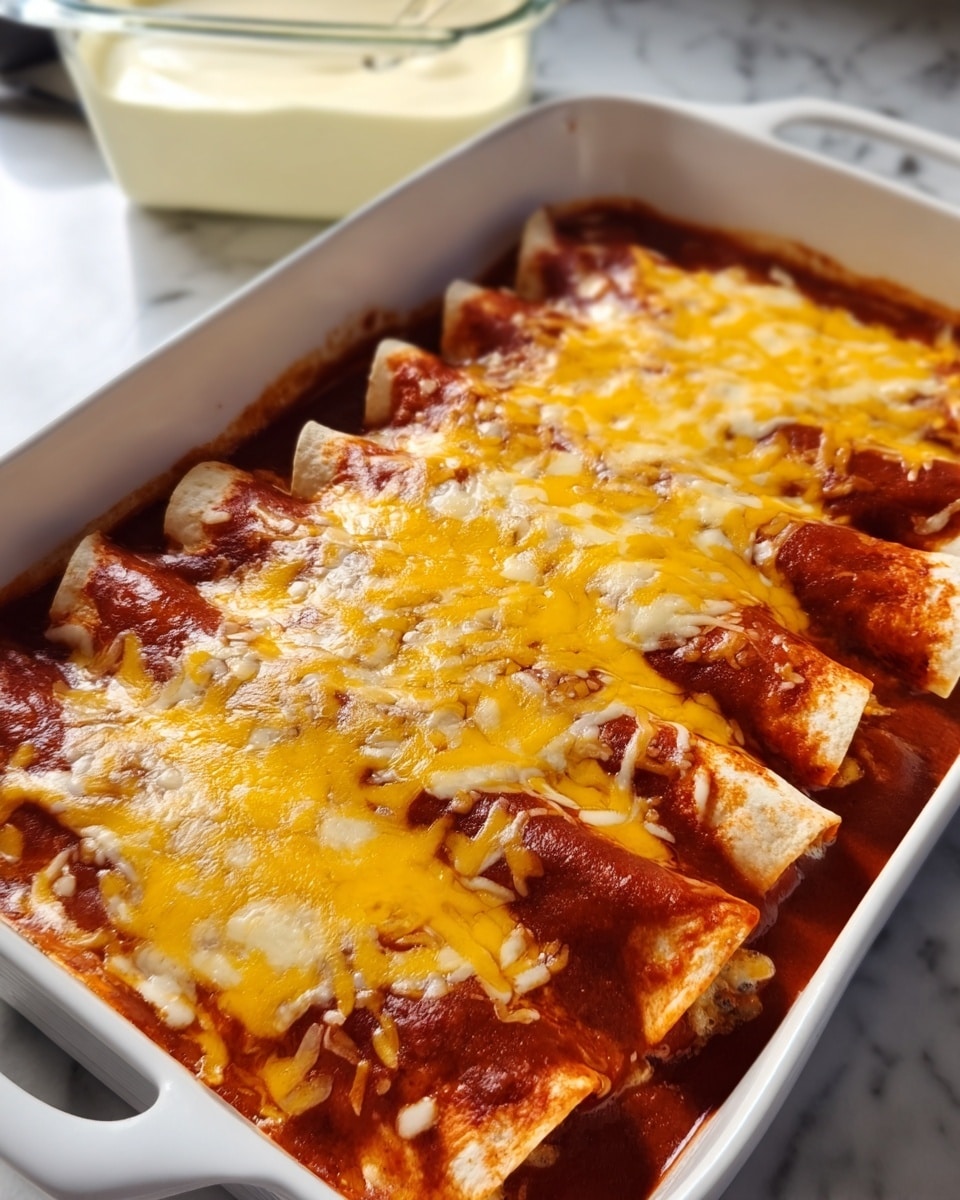
- Step 5: To assemble, spread about 2 tablespoons of enchilada sauce evenly over each flour tortilla. Add a generous line of the chicken and bean mixture on top, then sprinkle with about ⅓ cup of shredded cheese.
- Step 6: Roll up each tortilla tightly and place seam-side down in a greased 9×13-inch baking dish. Repeat with all tortillas.
- Step 7: Pour any remaining enchilada sauce over the rolled tortillas and sprinkle the remaining shredded cheese on top.
- Step 8: Bake uncovered for 20 minutes, or until the tortillas are slightly crispy and the cheese on top is melted and bubbly.
- Step 9: Serve hot, garnished with optional toppings such as chopped cilantro, diced red onions, avocado, sour cream, or crumbled cotija cheese.
Tips & Variations
- For extra flavor, marinate the chicken briefly in a bit of lime juice and cumin before cooking.
- Swap black beans for pinto or refried beans if preferred.
- Use corn tortillas for a gluten-free option, but warm them before assembling to prevent cracking.
- Add chopped jalapeños or hot sauce to the chicken mixture for a spicier kick.
- Leftover shredded chicken from a rotisserie bird can be used to save time.
Storage
Store leftover enchiladas in an airtight container in the refrigerator for up to 3 days. To reheat, cover with foil and warm in the oven at 350°F for about 15 minutes or until heated through. You can also microwave individual portions, but the tortillas might lose some crispness.
How to Serve
Serve this delicious recipe with your favorite sides.
FAQs
Can I make red enchilada sauce from scratch?
Yes, homemade red enchilada sauce is simple to make using dried chilies, garlic, onion, and spices. It often results in a fresher, more vibrant flavor compared to store-bought sauce.
Can I freeze these enchiladas?
Absolutely. Assemble the enchiladas but do not bake them. Wrap tightly in foil and freeze for up to 2 months. When ready, bake from frozen at 350°F for 30-35 minutes, adding extra time as needed until heated through.
PrintRed Chicken Enchiladas Recipe

These Red Chicken Enchiladas feature tender diced chicken cooked with green chilies and black beans, rolled in large flour tortillas, smothered in rich red enchilada sauce, and baked until bubbly and slightly crispy. Topped with melted Mexican-blend cheese and optional fresh garnishes, they make a satisfying and flavorful Mexican-inspired meal perfect for weeknight dinners or gatherings.
- Prep Time: 15 minutes
- Cook Time: 30 minutes
- Total Time: 45 minutes
- Yield: 8 enchiladas (serves 4-6) 1x
- Category: Main Course
- Method: Baking
- Cuisine: Mexican
Ingredients
For the Enchiladas
- 2 Tbsp avocado or olive oil
- 1 small white onion, diced
- 1½ lb boneless skinless chicken breasts, diced (~½-inch pieces)
- 1 (4 oz) can diced green chilies
- Salt and freshly cracked black pepper, to taste
- 1 (15 oz) can black beans, rinsed and drained
- 8 large flour tortillas
- 3 cups Mexican-blend shredded cheese
- 1 batch of red enchilada sauce
Optional Toppings
- Chopped cilantro
- Chopped red onions
- Diced avocado
- Sour cream
- Crumbled cotija cheese
Instructions
- Preheat & Prep Sauce: Preheat your oven to 350°F (175°C). While the oven is heating, prepare your batch of red enchilada sauce so it’s ready to use when assembling your enchiladas.
- Sauté the Filling: Heat 2 tablespoons of avocado or olive oil in a large skillet over medium-high heat. Add the diced onion and sauté for about 3 minutes until softened and fragrant. Add the diced chicken breasts along with the canned diced green chilies. Season with salt and freshly cracked black pepper to taste. Cook the chicken mixture, stirring occasionally, for 6 to 8 minutes or until the chicken is fully cooked through. Stir in the rinsed and drained black beans, then remove the skillet from heat.
- Assemble Enchiladas: Set up an assembly line with your tortillas, enchilada sauce, chicken and bean mixture, and shredded cheese. Take one tortilla at a time and spread around 2 tablespoons of red enchilada sauce evenly over it. Add a generous line of the chicken and bean filling in the center of the tortilla, then sprinkle about ⅓ cup of shredded Mexican-blend cheese over the filling. Roll the tortilla tightly and place it seam-side down in a greased 9 x 13 inch baking dish. Repeat this process for all eight tortillas. Once all are assembled in the dish, spoon any remaining sauce over the top and sprinkle with the remaining cheese.
- Bake: Place the baking dish uncovered in the preheated oven and bake for 20 minutes. The enchiladas are done when the tortillas become slightly crispy on top and the cheese is melted, bubbly, and golden.
- Serve: Remove the enchiladas from the oven and serve immediately. Garnish with your choice of fresh toppings such as chopped cilantro, diced red onions, avocado chunks, a dollop of sour cream, or a sprinkle of crumbled cotija cheese for added flavor and texture.
Notes
- For a spicier version, add some chopped jalapeños to the chicken mixture or use a spicy enchilada sauce.
- Use corn tortillas instead of flour for a gluten-free option.
- Leftover enchiladas can be stored covered in the refrigerator for up to 3 days and reheated in the oven.
- If you prefer a saucier enchilada, add extra enchilada sauce before baking.
- Shredded rotisserie chicken can be used as a time-saving alternative to diced raw chicken breast.
Keywords: red chicken enchiladas, baked enchiladas, Mexican chicken recipe, easy enchiladas, chicken and black beans, enchilada sauce


