
Homemade Fruit Gummies with Fresh Fruit and Gelatin Recipe
Introduction
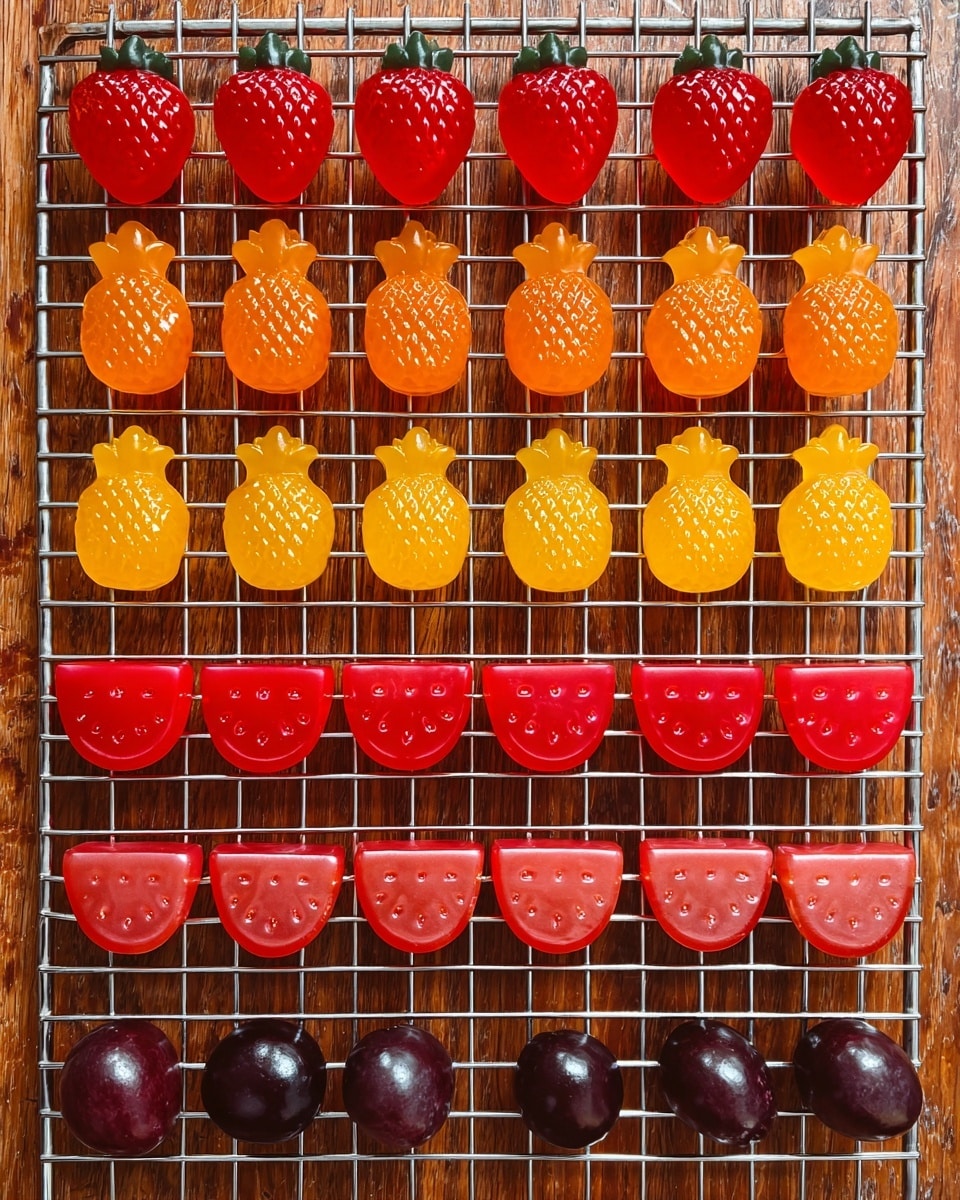
These homemade fruit snacks are a fun and healthy treat that you can easily make at home using fresh fruit and gelatin. They offer a delicious alternative to store-bought gummies with natural flavors and a chewy texture that everyone will enjoy.
Ingredients
- 170-180g fresh fruit (~1 cup blended)
- 2 envelopes (14g) gelatin
- 3 tablespoons lemon juice
- 3 tablespoons honey or agave
Instructions
- Step 1: Add the fresh fruit to a blender and blend until completely smooth.
- Step 2: In a small container, sprinkle gelatin evenly over the lemon juice and stir thoroughly until no dry grains remain. Let it sit for 5 minutes to bloom.
- Step 3: While the gelatin blooms, combine the fruit purée with honey or agave in a small saucepan over low heat. Stir gently until combined and heated above 120˚F but do not boil. For pineapple or fruits containing enzymes like mango or kiwi, heat the purée to at least 176˚F for about 8 minutes to deactivate enzymes that prevent setting.
- Step 4: Add the gelatin and lemon juice mixture to the warmed fruit purée, stirring until completely dissolved. Remove from heat and let cool for about 5 minutes.
- Step 5: Lightly spray silicone molds with avocado oil or cooking spray. Use a spoon or dropper to fill the molds with the fruit mixture, then refrigerate for 1.5 hours to set.
- Step 6: Remove the gummies from the molds and place them on a wire rack. Let them sit for 8 hours or overnight to dry. They will shrink and develop a chewy texture with intensified flavor.
- Step 7: (Optional) For sour gummy worms, toss the dried gummies in a 4:1 mixture of sugar to citric acid before serving.
- Step 8: Store the fully dried gummies in an airtight container in the refrigerator for up to 2 weeks.
Tips & Variations
- Use a variety of fresh fruits to create different flavors; just adjust blending and enzyme deactivation times accordingly.
- If the fruit purée is too thick, add a little water to help blend it smoothly.
- Gently heating pineapple or kiwi purée helps ensure your gummies set properly by deactivating enzymes that break down gelatin.
- Silicone molds shaped like fun characters or worms make the snacks more appealing for kids.
- For a vegan alternative, substitute gelatin with agar-agar but note the texture will be different.
Storage
Store your homemade fruit snacks in an airtight container in the refrigerator for up to 2 weeks. Keep them dry and cool to maintain their chewy texture. To enjoy, bring them to room temperature or eat straight from the fridge. Avoid freezing, as it may affect the texture.
How to Serve
Serve this delicious recipe with your favorite sides.
FAQs
Can I use frozen fruit instead of fresh?
Yes, you can use frozen fruit. Thaw it completely and drain any excess liquid before blending to achieve the right consistency.
Why did my gummies not set properly?
If your gummies did not set, it could be due to not blooming the gelatin properly, boiling the fruit mixture which breaks down gelatin, or using fresh fruit that contains enzymes like pineapple or kiwi without adequate heat to deactivate them.
PrintHomemade Fruit Gummies with Fresh Fruit and Gelatin Recipe
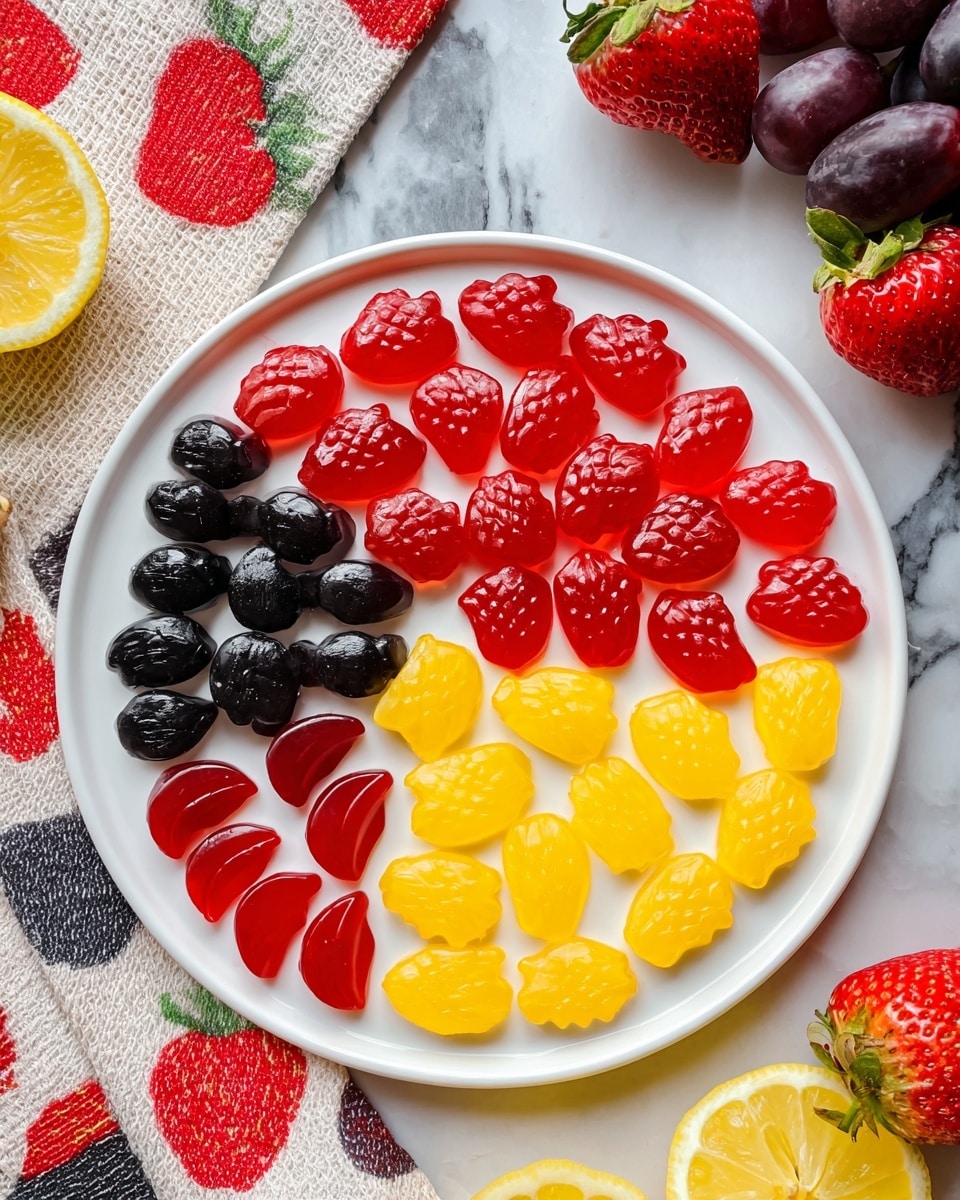
Homemade Fruit Snacks are a delicious and healthy way to enjoy your favorite fresh fruits in a chewy, gummy form. Made with blended fresh fruits, gelatin, lemon juice, and natural sweeteners like honey or agave, these fruit gummies are perfect for a guilt-free treat. This recipe guides you through creating different fruit flavors while carefully managing the gelatin and heat to achieve the perfect texture. Ideal for snack lovers who want to avoid artificial ingredients and enjoy a fun, homemade candy.
- Prep Time: 15 minutes
- Cook Time: 15 minutes (including heating and setting)
- Total Time: 10 hours (including drying time overnight)
- Yield: Approximately 20–25 gummies depending on mold size 1x
- Category: Snacks
- Method: Stovetop
- Cuisine: American
- Diet: Vegetarian
Ingredients
General Ingredients
- 2 envelopes (14g) gelatin
- 3 tablespoons lemon juice
- 3 tablespoons honey or agave
Fruit Purées (Each approximately 170-180g or about 1 cup blended)
- Fresh fruit (choose one): strawberry, pineapple, watermelon, black seedless grapes
- For kiwi and granny smith apple blend: 90g each kiwi and granny smith apple (peeled), may add water to thin out for blending
Instructions
- Blend the Fruit: Add your chosen fresh fruit to a blender and blend until completely smooth to create a fruit purée base for your gummies.
- Bloom the Gelatin: In a small container, sprinkle the gelatin evenly over the lemon juice. Stir thoroughly until there are no dry grains visible, then let it sit for 5 minutes to bloom.
- Heat Fruit Purée and Sweetener: While the gelatin is blooming, combine the fruit purée with honey or agave in a small saucepan over low heat. Stir constantly to combine. Heat the purée to melt the gelatin (above approximately 120°F) but avoid boiling to prevent gelatin denaturation. For pineapple, heat to 176°F and maintain for about 8 minutes to deactivate enzymes that would prevent setting.
- Incorporate Gelatin Mixture: Add the bloomed gelatin and lemon juice mixture to the warmed fruit purée and stir until gelatin is fully dissolved. Remove the pan from heat and allow it to cool for about 5 minutes.
- Fill Molds: Lightly spray silicon molds with avocado oil or cooking spray. Use a spoon or dropper to fill the molds evenly with the fruit and gelatin mixture. Transfer molds to the refrigerator to set.
- Refrigerate to Set: Refrigerate for 1.5 hours to allow the gummies to solidify and hold their shape.
- Dry and Enhance Flavor: Remove gummies from molds and place them on a wire rack. Let them sit for 8 hours or overnight. This drying process shrinks the gummies and intensifies the flavor while developing a chewy gummy texture.
- Optional Sour Coating: For sour gummy worms, toss the dried gummies in a 4:1 sugar to citric acid mixture before enjoying.
- Storage: Once dried, store gummies in an airtight container in the refrigerator for up to 2 weeks to maintain freshness.
Notes
- Heating pineapple and similar fruits to deactivate enzymes is crucial for setting gummies properly.
- Do not boil the fruit purée to preserve gelatin effectiveness.
- Adjust sweetness by varying honey or agave amounts according to taste.
- Silicon molds with fun shapes make the gummies more appealing to kids.
- Use a dropper for precise filling to avoid spills and ensure even molds.
- Drying the gummies overnight enhances the chewy texture and intensifies flavors.
- Store gummies in the fridge to prevent spoilage and maintain texture.
Keywords: fruit snacks, homemade gummies, healthy gummies, gelatin fruit snacks, natural fruit candy, DIY fruit gummies


