
Healthy 3-Ingredient Brownies | Gluten-Free, Vegan, No Sugar Added Recipe
Introduction
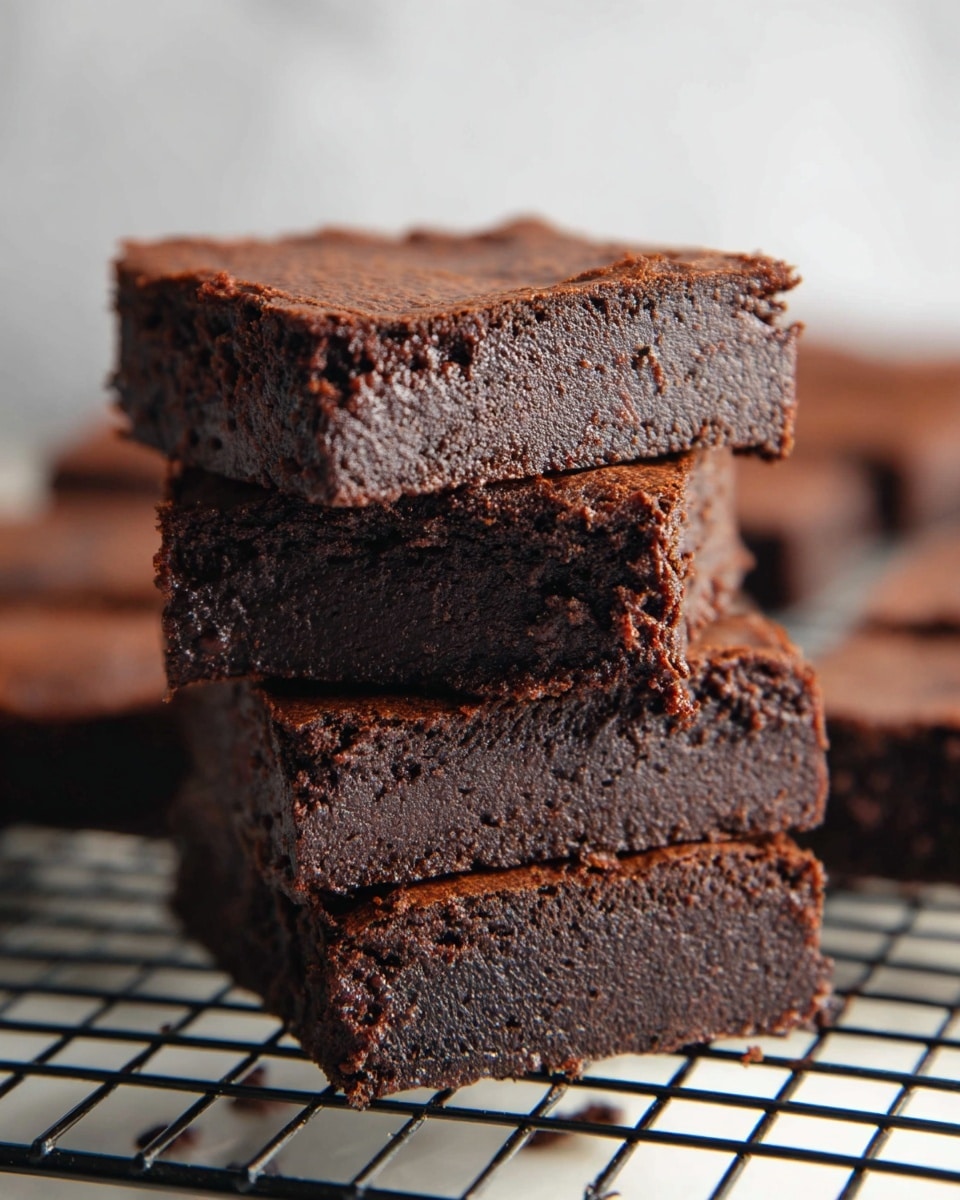
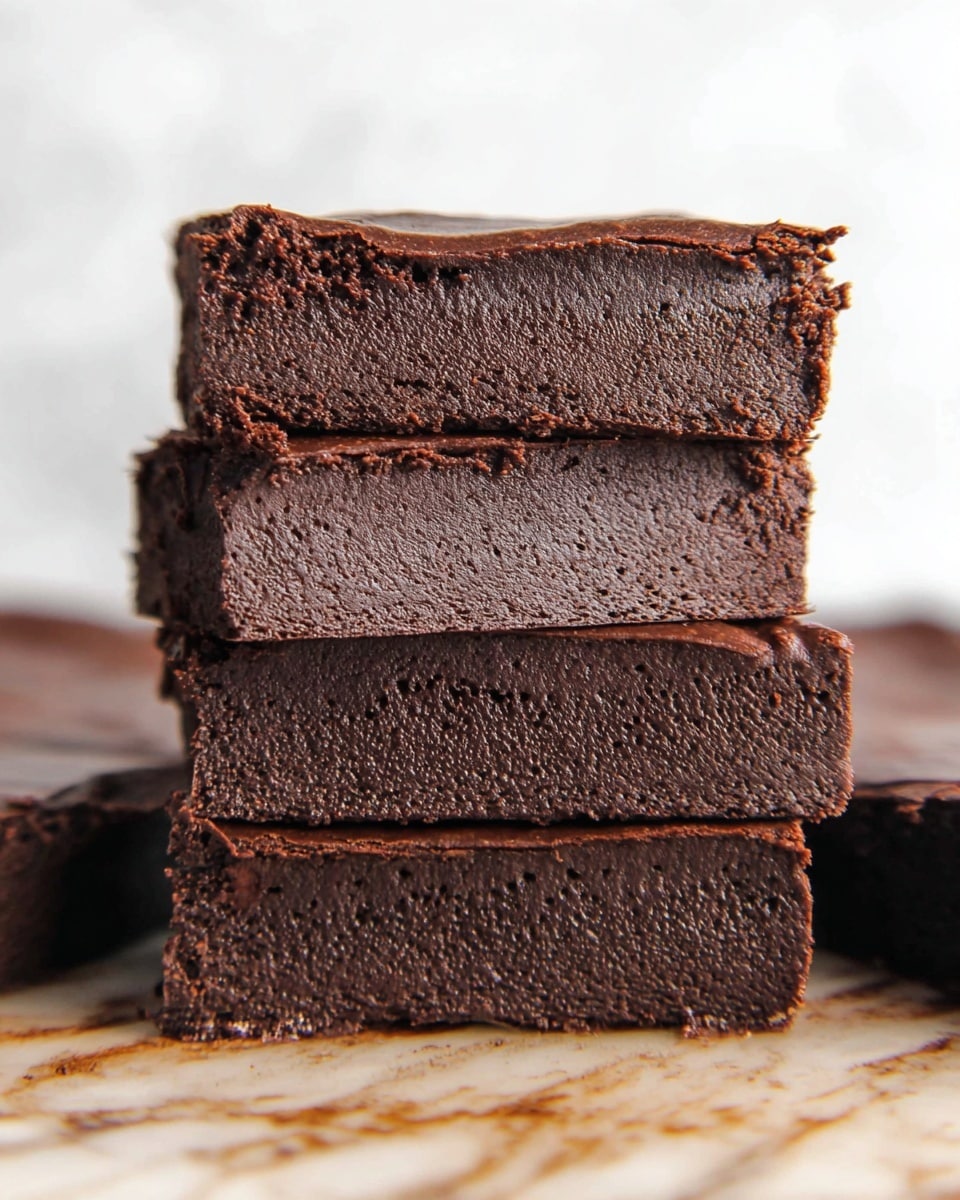
These healthy 3-ingredient brownies are a simple, delicious treat that’s both gluten-free and vegan. Made with ripe bananas, cocoa powder, and natural peanut butter, they’re naturally sweetened without added sugar. Perfect for a quick snack or dessert with wholesome ingredients you can feel good about.
Ingredients
- 4 ripe bananas (about 450–480g peeled)
- ⅓ cup (35 g) cocoa powder
- ⅔ cup (167 g) natural peanut butter
Instructions
- Step 1: Preheat your oven to 350°F (175°C). Line an 8-inch (20 cm) square baking pan with parchment paper, leaving an overhang on two sides for easy removal of the brownies.
- Step 2: Place the peeled bananas into a food processor and blend until completely smooth. Add the cocoa powder and natural peanut butter, then blend again until you have a thick, smooth batter.
- Step 3: Taste the batter. If you prefer your brownies sweeter, stir in a preferred sweetener now, then mix well.
- Step 4: Spread the batter evenly in the prepared pan. Bake for 25–30 minutes, or until the center is set and a toothpick inserted comes out mostly clean.
- Step 5: Allow the brownies to cool in the pan for at least 15–20 minutes. Then use the parchment paper to lift them out and cut into squares. Letting them cool fully will improve the texture.
Tips & Variations
- Use ripe bananas with brown spots for the best natural sweetness and flavor.
- Substitute peanut butter with almond or sunflower seed butter for a different taste or to accommodate allergies.
- For added texture, fold in chopped nuts or vegan chocolate chips before baking.
- If you want a sweeter brownie, add a tablespoon of maple syrup or agave nectar along with the other ingredients.
Storage
Store the brownies in an airtight container at room temperature for up to 2 days, or refrigerate for up to 5 days. They can also be frozen for up to 3 months. To reheat, warm gently in the microwave or enjoy chilled for a fudgier texture.
How to Serve
Serve this delicious recipe with your favorite sides.
FAQs
Can I use other types of nut butter for this recipe?
Yes, you can substitute peanut butter with almond butter, cashew butter, or sunflower seed butter without affecting the texture much. Just choose natural, unsweetened versions for best results.
Are these brownies really gluten-free and vegan?
Absolutely. All ingredients used are naturally gluten-free and vegan, making these brownies suitable for many dietary preferences and restrictions.
PrintHealthy 3-Ingredient Brownies | Gluten-Free, Vegan, No Sugar Added Recipe
These Healthy 3-Ingredient Brownies are a guilt-free treat that require minimal ingredients and effort. Made with ripe bananas, natural peanut butter, and cocoa powder, they are naturally gluten-free, vegan, and contain no added sugar. Perfect for a wholesome dessert or snack, these brownies offer a deliciously fudgy texture with wholesome nutrition.
- Prep Time: 10 minutes
- Cook Time: 25 minutes
- Total Time: 35 minutes
- Yield: 9 brownies (3×3 squares) 1x
- Category: Dessert
- Method: Baking
- Cuisine: American
- Diet: Gluten Free, Vegan
Ingredients
Brownie Batter
- 4 ripe bananas (about 450–480g peeled)
- ⅓ cup (35 g) cocoa powder
- ⅔ cup (167 g) natural peanut butter
Instructions
- Prepare the pan: Preheat your oven to 350°F (175°C). Line an 8-inch (20 cm) square baking pan with parchment paper, leaving overhang on two sides to make removing the brownies easier after baking.
- Blend the batter: Peel the bananas and add them to a food processor. Blend until completely smooth and creamy. Then add the cocoa powder and natural peanut butter to the processor, blending again until the mixture forms a thick and smooth batter.
- Optional sweetness: Taste the batter. If you prefer a sweeter flavor, you can add your choice of sweetener (such as maple syrup or agave nectar) at this time and mix it thoroughly into the batter.
- Bake: Evenly spread the batter into the prepared baking pan. Place the pan in the preheated oven and bake for 25 to 30 minutes until the brownies are set in the center and a toothpick inserted comes out mostly clean with just a few moist crumbs.
- Cool & slice: Remove the pan from the oven and let the brownies cool in the pan for at least 15 to 20 minutes. Then, use the parchment paper overhang to lift the brownies out of the pan. Once fully cooled, cut into squares. The texture of the brownies will improve as they cool completely.
Notes
- You can add a natural sweetener like maple syrup, agave nectar, or coconut sugar to increase sweetness if desired.
- Make sure the bananas are very ripe for the best natural sweetness and moist texture.
- Use natural peanut butter without added sugars or oils for the healthiest version.
- The brownies will firm up more after cooling, so don’t worry if they seem slightly soft when hot.
- Store leftovers in an airtight container in the refrigerator for up to 5 days.
Keywords: Healthy brownies, gluten free brownies, vegan brownies, 3 ingredient dessert, no sugar added brownies, peanut butter brownies, banana brownies
