
Classic Homemade Crystal Candy Recipe
Introduction
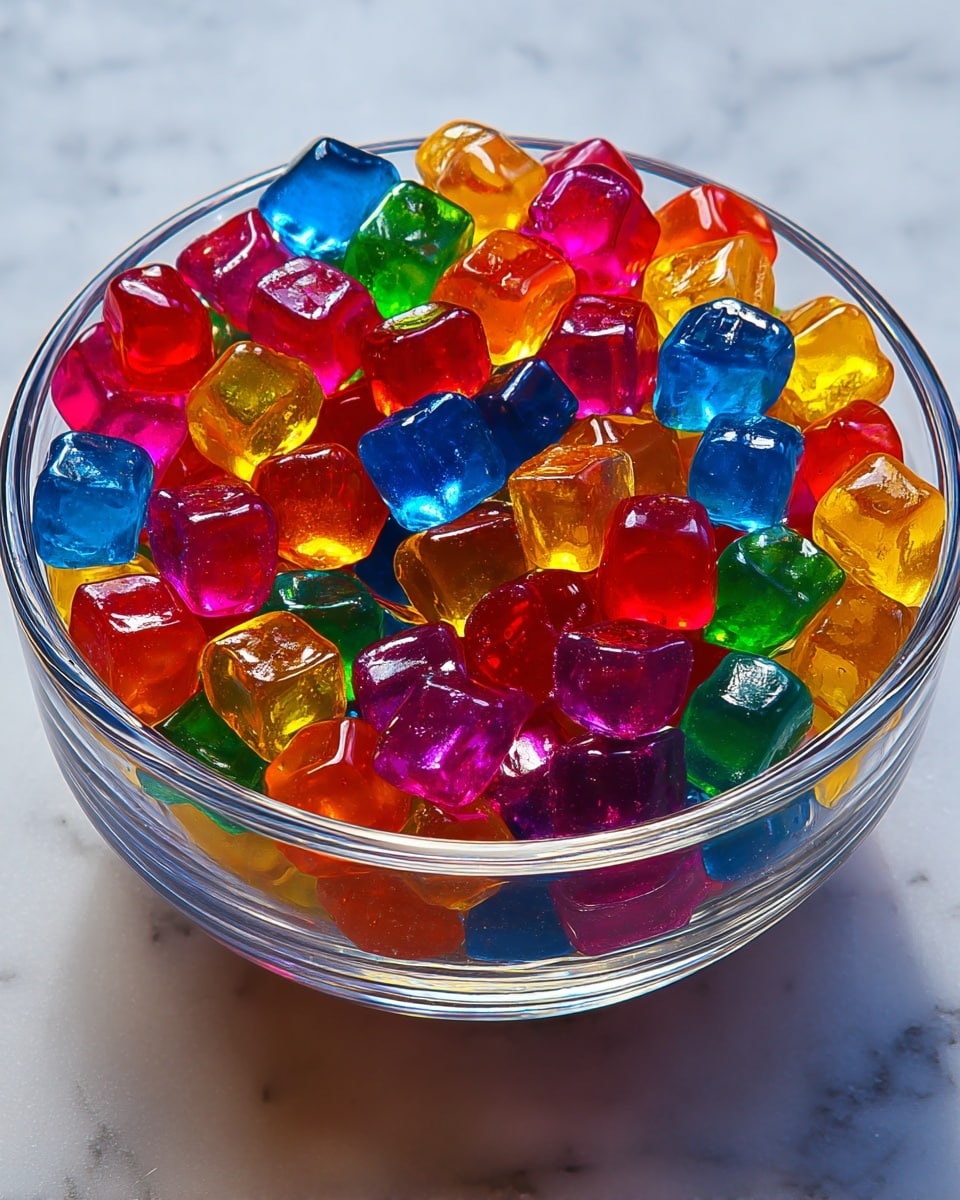
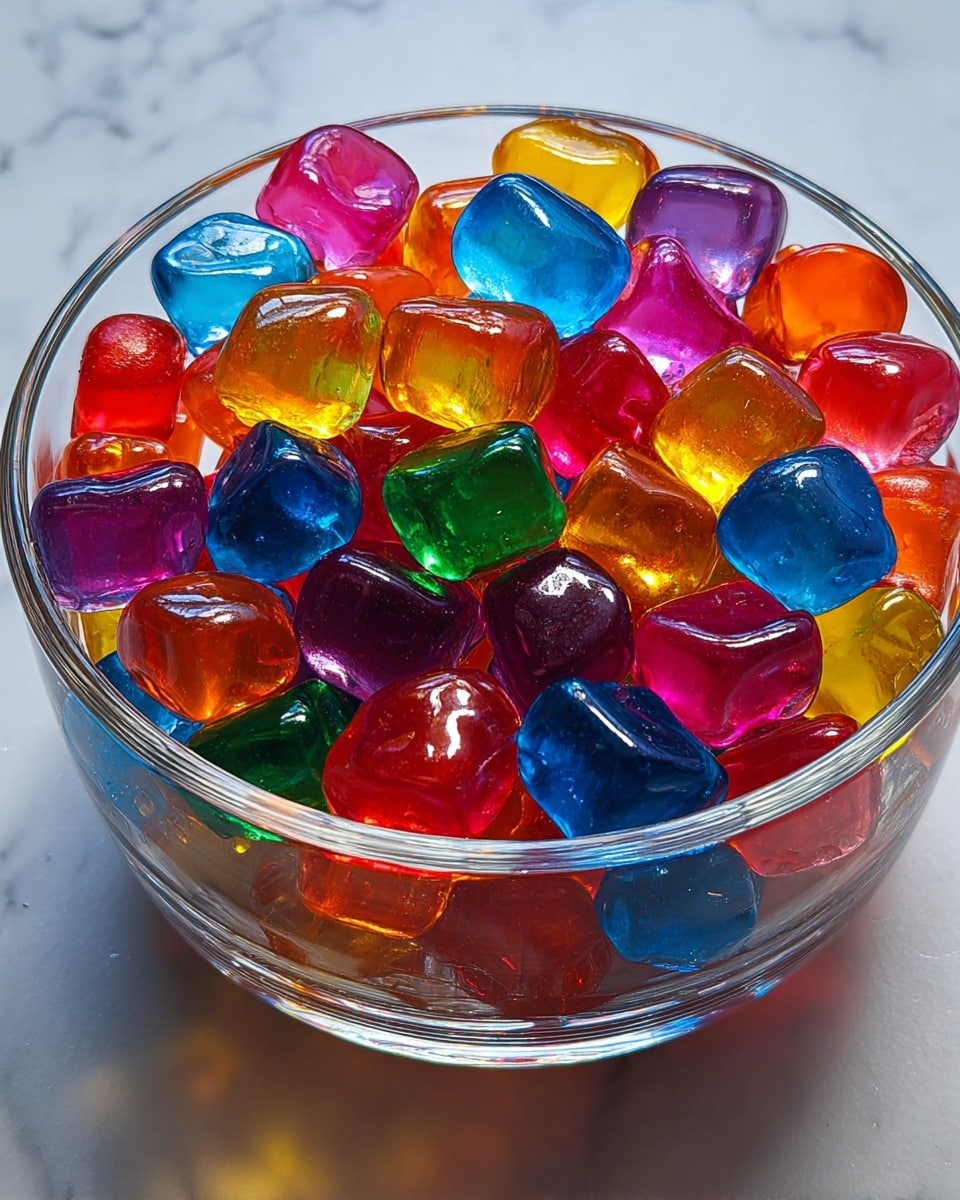
Classic Homemade Crystal Candy is a timeless treat known for its sparkling appearance and satisfying crunch. This simple recipe lets you create beautiful, colorful candy right in your own kitchen, perfect for gifting or enjoying as a sweet snack.
Ingredients
- 2 cups Granulated Sugar
- 1 cup Water
- 1-2 teaspoons Food Coloring (optional)
- 1 teaspoon Flavoring Extracts (such as lemon or mint)
- 1 tablespoon Cornstarch (optional, to prevent sticking)
Instructions
- Step 1: Prepare your workspace and gather all ingredients and tools needed for the recipe.
- Step 2: In a saucepan, combine 2 cups of granulated sugar with 1 cup of water. Stir gently to help the sugar dissolve.
- Step 3: Place the saucepan over medium heat and bring the mixture to a boil, avoiding stirring during this time.
- Step 4: Insert a candy thermometer and continue boiling until the temperature reaches 300°F (150°C), which is the hard crack stage.
- Step 5: If desired, add 1-2 teaspoons of food coloring and stir gently to blend the color evenly.
- Step 6: Remove the saucepan from heat and let the mixture cool slightly before stirring in 1 teaspoon of your chosen flavoring extract.
- Step 7: Pour the candy mixture onto a prepared baking sheet and allow it to set at room temperature until hardened.
- Step 8: Once the candy has hardened, break it into desired shapes. If using, dust the pieces with 1 tablespoon of cornstarch to prevent them from sticking together.
- Step 9: Store the crystal candy in an airtight container at room temperature.
Tips & Variations
- Use natural extracts like peppermint or almond for subtle flavor variations.
- For a sparkly finish, sprinkle a little sanding sugar on the candy before it sets.
- If you don’t have a candy thermometer, test by dropping a small amount of syrup in cold water—it should harden and snap.
- Try arranging small cookie cutters on the baking sheet and pouring the candy inside for shaped candies.
Storage
Store your crystal candy in an airtight container at room temperature to keep it crisp. Avoid humid environments as moisture can cause the candy to become sticky or soft. Properly stored, the candy will keep fresh for several weeks. Reheating is not recommended, as it will change the texture.
How to Serve
Serve this delicious recipe with your favorite sides.
FAQs
Can I use alternative sweeteners instead of granulated sugar?
Granulated sugar is essential for the correct texture and crystal formation in this recipe. Alternative sweeteners generally will not produce the same hard candy results.
What should I do if my candy turns out sticky?
Sticky candy can result from humidity or not reaching the proper temperature. Make sure to boil the mixture until it reaches 300°F (150°C) and store the candy in a dry, airtight container.
PrintClassic Homemade Crystal Candy Recipe
Classic Homemade Crystal Candy is a timeless sweet treat made by boiling sugar and water to the hard crack stage, then flavored and colored for a delightful, crunchy candy. Perfect for candy lovers looking to create homemade confections with simple ingredients and traditional methods.
- Prep Time: 10 minutes
- Cook Time: 15 minutes
- Total Time: 25 minutes
- Yield: Approximately 24 small pieces 1x
- Category: Candy
- Method: Stovetop
- Cuisine: American
Ingredients
Ingredients
- 2 cups Granulated Sugar
- 1 cup Water
- 1–2 teaspoons Food Coloring (optional)
- 1 teaspoon Flavoring Extracts (lemon, mint, or preferred flavor)
- 1 tablespoon Cornstarch (optional, for dusting)
Instructions
- Prepare Workspace: Gather all your ingredients and necessary tools including a saucepan, candy thermometer, baking sheet, and spatula. Ensure your baking sheet is lined or greased for easy candy removal.
- Dissolve Sugar: Combine 2 cups of granulated sugar with 1 cup of water in the saucepan. Stir gently to dissolve the sugar before heating.
- Boil the Mixture: Place the saucepan over medium heat and bring the mixture to a boil. Avoid stirring once boiling begins to prevent crystallization.
- Heat to Hard Crack Stage: Insert a candy thermometer and continue boiling the syrup until it reaches 300°F (150°C), known as the hard crack stage, critical for the candy’s crunchiness.
- Add Coloring: Once the desired temperature is reached, carefully add food coloring of your choice for visual appeal and stir gently to distribute color evenly.
- Cool Slightly and Flavor: Remove the saucepan from heat and allow it to cool slightly before adding your chosen flavoring extracts to preserve their delicate flavors.
- Pour and Set: Pour the hot candy mixture onto the prepared baking sheet, spreading evenly if desired. Let it cool and harden at room temperature undisturbed.
- Break and Dust: After the candy has fully hardened, break it into pieces of your preferred size and dust with cornstarch if using to prevent sticking.
- Storage: Store the crystal candy in an airtight container at room temperature to maintain freshness and prevent moisture absorption.
Notes
- Use a candy thermometer for accurate temperature measurement to ensure the candy reaches the hard crack stage.
- Do not stir the syrup once boiling to prevent sugar crystallization.
- Flavor extracts should be added off heat to retain their aroma and taste.
- Cornstarch dusting helps keep candy pieces from sticking together during storage.
- Work carefully when handling hot sugar syrup to avoid burns.
Keywords: crystal candy, homemade candy recipe, hard candy, boiled sugar candy, classic candy

