
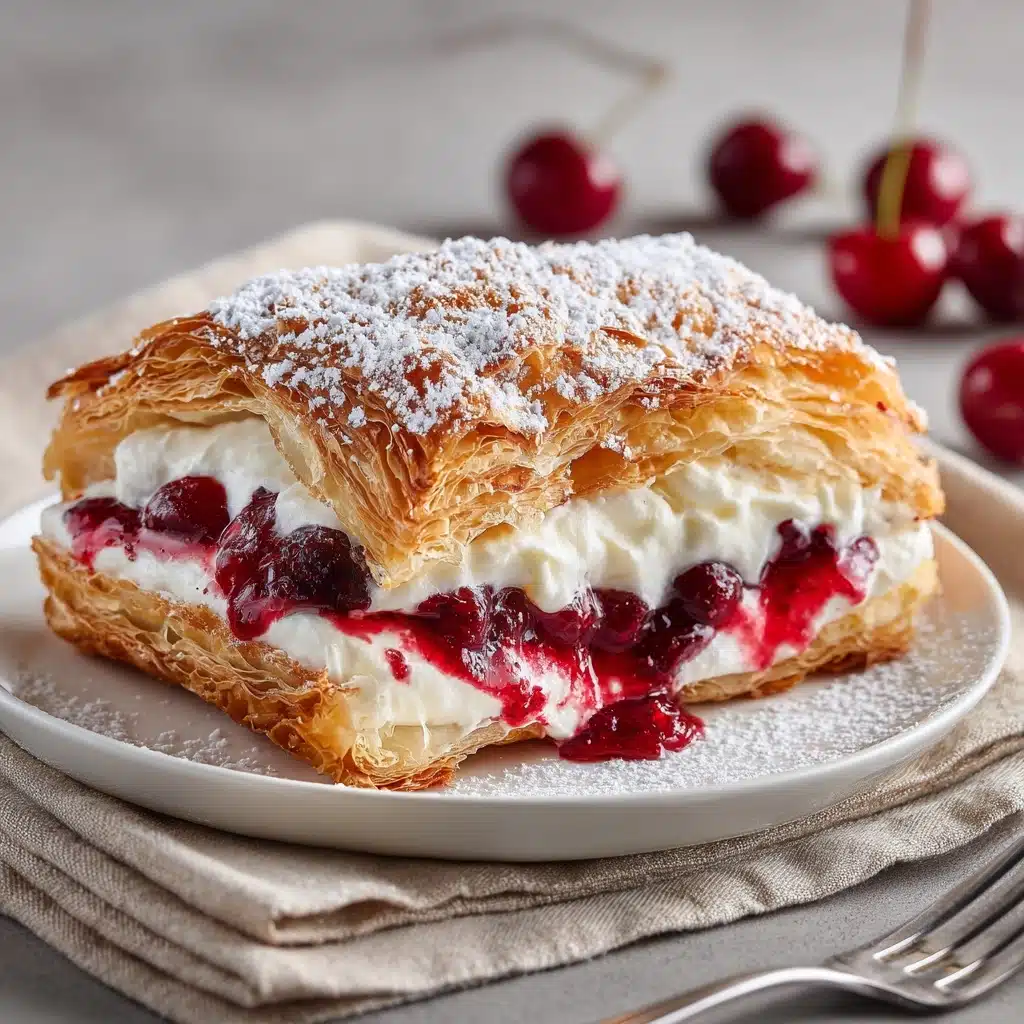
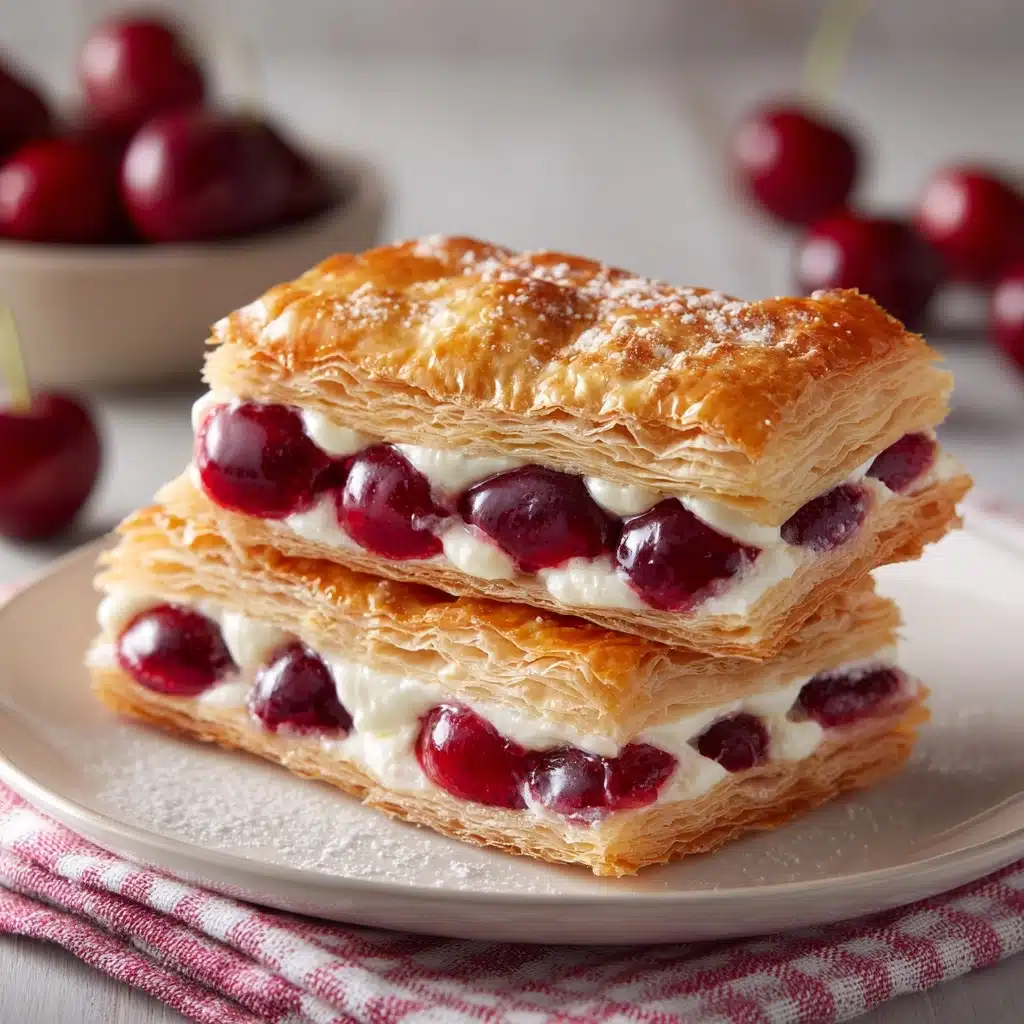
Cherry Cheese Danish Recipe
There’s just something magical about a Cherry Cheese Danish – that irresistible combo of flaky pastry, creamy filling, and sweet-tart cherries always feels like a treat worth celebrating. Whether it’s a lazy weekend brunch, a fancy gathering, or simply an afternoon coffee break, this recipe shines for its flavor and ease. The keyphrase “Cherry Cheese Danish” represents more than a breakfast pastry: it’s little bites of happiness you can whip up in just a few simple steps, yet it looks and tastes as if it came straight from a bakery!
Ingredients You’ll Need
The beauty of a homemade Cherry Cheese Danish lies in its simplicity. Each ingredient plays a starring role—some for flavor, some for structure, and all to give you those bakery-fresh results at home without any fuss.
- Puff Pastry: Store-bought puff pastry delivers a crisp, buttery base that’s reliably flaky and impressive, but requires zero pastry skills.
- Cherry Pie Filling: Canned cherry pie filling brings a classic sweet-tart kick and saves time without compromising on that iconic flavor.
- Cream Cheese: Full-fat and softened, this gives the Danish its signature creamy, tangy center—make sure it’s soft for silky results.
- Granulated Sugar: Just enough to sweeten the cheese mixture, balancing the tang and tying every flavor together beautifully.
- Vanilla Extract: Adds warmth and a hint of floral sweetness, making the cream cheese mixture sing.
- Egg: Beaten for an egg wash, it’s your secret to a beautifully golden, shiny finish—don’t skip it!
How to Make Cherry Cheese Danish
Step 1: Prep the Oven and Pastry
Start by preheating your oven to 375°F (190°C)—this ensures your Cherry Cheese Danish gets that gorgeous, even bake. While the oven is warming up, lightly flour your work surface to keep the puff pastry from sticking. Unfold your thawed sheet of puff pastry and roll it out just slightly so you can cut it into four even 4×4-inch squares. These manageable-sized squares are perfect for making individual, bakery-style treats right at home.
Step 2: Mix the Cream Cheese Filling
In a medium bowl, use a hand mixer or a sturdy spoon to beat together the softened cream cheese, sugar, and vanilla extract. You’re aiming for a super smooth, creamy, and thick filling with all the sugar dissolved. This step is as simple as it is satisfying—don’t be tempted to rush, because a silky filling makes every bite of your Cherry Cheese Danish melt-in-your-mouth delicious.
Step 3: Fill and Assemble the Danishes
Place each puff pastry square on a parchment-lined baking sheet. Spoon about a tablespoon of your cream cheese mixture right into the center of each one—don’t overdo it or you’ll risk overflow. Next, top the cream cheese with a generous spoonful of cherry pie filling. The promise of that sweet cherry center is what makes these irresistible!
Step 4: Shape and Seal
Gently fold the corners of each square up and over the fillings, meeting in the center. Give the seams a gentle pinch or press so everything stays nestled and cozy during baking. This simple folding technique gives your Cherry Cheese Danish its classic pocket shape, keeping all those luscious layers and gooey fillings wrapped up inside.
Step 5: Egg Wash and Bake
Whisk the egg in a small bowl and use a pastry brush to lightly coat the surface of each Danish. This magic touch guarantees a shiny, appetizing finish, adding a subtle richness to the flavor. Bake the pastries in your preheated oven for 20 to 25 minutes, or until the tops are beautifully golden brown and the edges are crisp. The hardest part will be letting them cool just enough to eat without burning your tongue!
How to Serve Cherry Cheese Danish
Garnishes
To make your Cherry Cheese Danish feel even more special, dust the still-warm pastries with a light shower of powdered sugar for a classic bakery look. You could also drizzle a simple glaze made of powdered sugar and milk, or even top each Danish with a few toasted almond slices for extra crunch. A fresh mint leaf or two can add a pop of color as well.
Side Dishes
For a full brunch spread, serve your Cherry Cheese Danish alongside fresh fruit—think juicy orange slices, melon, or a small fruit salad. They’re also exquisite with a scoop of creamy yogurt or paired with crispy bacon for a salty-sweet contrast. And of course, nothing beats a hot cup of coffee, tea, or an iced latte if you’re feeling fancy.
Creative Ways to Present
For special occasions, arrange the Danishes on a platter with extra cherry filling artistically dotted around the edges. Consider baking mini versions using smaller squares of puff pastry for bite-sized party treats, or stack two together with an extra spoonful of cream cheese filling in the middle for a deluxe, double-decker Cherry Cheese Danish experience. Individual cake boxes tied with ribbon turn these pastries into spectacular homemade gifts.
Make Ahead and Storage
Storing Leftovers
If you find yourself with leftovers (though that doesn’t happen often), store your Cherry Cheese Danish in an airtight container in the fridge. They’ll keep for up to three days, staying surprisingly crisp and fresh. A quick 10-second zap in the microwave brings back their just-baked magic.
Freezing
Cherry Cheese Danish freeze beautifully! Arrange cooled pastries on a baking sheet, freeze until firm, then transfer to a zip-top bag or airtight container. They’ll be good for up to two months. Freeze unglazed for best texture, and don’t forget to label the date—they may disappear fast!
Reheating
For that irresistible fresh-from-the-oven taste, reheat a frozen (or chilled) Danish in a 350°F (175°C) oven for about 10 minutes, or until warmed through and crisp. Avoid the microwave for frozen Danishes if you want to keep that shatteringly crisp pastry bite.
FAQs
Can I use a different fruit filling?
Absolutely! While cherry is classic, blueberry, raspberry, or even apple pie filling are fantastic alternatives, letting you customize your Danish to any season or craving.
Can I make these ahead for a party?
Yes! Prep your Cherry Cheese Danish up to the assembling stage and refrigerate the tray (covered loosely with plastic wrap) for a few hours before baking. Pop them in the oven just before guests arrive for a truly fresh treat.
What if I don’t have puff pastry?
If puff pastry isn’t available, crescent roll dough can make a lovely shortcut, though the texture will be more roll-like than classic Danish. Homemade rough puff or even pre-made croissant dough work too in a pinch.
Can I use homemade cherry filling?
Certainly! If you have a favorite homemade cherry filling or want to cook down fresh or frozen cherries with sugar and a bit of cornstarch, your Cherry Cheese Danish will have an extra special, tangy-sweet flavor.
Is there a way to make them less sweet?
Sure thing! Simply reduce the sugar in the cream cheese mixture or choose a low-sugar cherry pie filling. You can also add a little lemon zest to the cheese to brighten things up without extra sweetness.
Final Thoughts
Baking a Cherry Cheese Danish at home is wonderfully rewarding—unexpectedly easy, endlessly satisfying, and guaranteed to bring smiles from the very first bite. Give these a try, share them with someone you love, and let a little homemade magic start your day right!
PrintCherry Cheese Danish Recipe

Indulge in the delightful flavors of these Cherry Cheese Danishes! A perfect combination of flaky puff pastry, creamy cheese filling, and sweet cherry topping, these pastries are a treat for any occasion.
- Prep Time: 15 minutes
- Cook Time: 20-25 minutes
- Total Time: 40 minutes
- Yield: 4 danishes 1x
- Category: Pastries
- Method: Baking
- Cuisine: European
- Diet: Vegetarian
Ingredients
Puff Pastry:
- 1 sheet puff pastry (thawed)
Cheese Filling:
- 8 oz cream cheese (softened)
- 1/4 cup granulated sugar
- 1 tsp vanilla extract
Cherry Topping:
- 1 cup cherry pie filling (canned)
- 1 egg (for egg wash)
Instructions
- Preheat the oven: Preheat the oven to 375°F (190°C).
- Prepare the pastry: Roll out the thawed puff pastry on a floured surface and cut into four 4×4-inch squares.
- Make the cheese filling: In a bowl, mix softened cream cheese, sugar, and vanilla until smooth.
- Assemble the Danishes: Place a spoonful of cream cheese mixture in the center of each square and add a dollop of cherry pie filling on top. Fold the corners of the pastry over the filling to create pockets and pinch to seal.
- Brush with egg wash: Brush each danish with beaten egg for a golden finish.
- Bake: Bake for 20-25 minutes or until golden brown.
Notes
- You can sprinkle some powdered sugar on top before serving for an extra touch of sweetness.
- Feel free to customize with different fruit fillings for variety.
Nutrition
- Serving Size: 1 danish
- Calories: 320
- Sugar: 16g
- Sodium: 260mg
- Fat: 21g
- Saturated Fat: 10g
- Unsaturated Fat: 9g
- Trans Fat: 0g
- Carbohydrates: 29g
- Fiber: 1g
- Protein: 5g
- Cholesterol: 75mg
Keywords: Cherry, Cheese, Danish, Pastry, Breakfast, Brunch, Dessert
