
Homemade Cheeze-Its Recipe
When you’re craving something salty, crunchy, and just a little bit nostalgic, nothing hits the spot quite like Homemade Cheeze-Its! These addictive, cheesy crackers are a warm, oven-baked tribute to the store-bought classic, yet so much more special because you made them yourself. Each bite is perfectly crispy, beautifully golden, and bursting with bold cheddar flavor. Trust me: once you see how easy it is to make Homemade Cheeze-Its at home, you’ll never look at the orange box the same way again.
Ingredients You’ll Need
Every ingredient in this recipe has a starring role, ensuring your Homemade Cheeze-Its deliver on that signature flavor and crunch. These simple pantry staples work together to transform into cheesy, savory crackers nobody can resist!
- Shredded sharp cheddar cheese: The sharper, the better for bold flavor and that traditional orange hue.
- Salted butter, softened: This adds richness and ensures your crackers come out crisp and flaky.
- Seasoning salt: A perfect blend for that classic savory punch—don’t skip this!
- Garlic powder: Just enough to add a subtle background note and depth.
- All-purpose flour: The backbone of the dough that holds everything together and crisps up in the oven.
- Ice water: Helps the dough come together without making it sticky; cold water is key for flaky crackers.
How to Make Homemade Cheeze-Its
Step 1: Combine Cheese, Butter, and Seasonings
Start by adding your shredded cheddar cheese, softened butter, seasoning salt, and garlic powder to the bowl of your food processor or blender. Pulse everything together in short bursts until the mixture turns crumbly. This step ensures that every cracker is infused with buttery, cheesy goodness right from the start.
Step 2: Add Flour
Sprinkle in your all-purpose flour and pulse again. The dough will start to look like coarse, sandy crumbs—don’t worry, that’s exactly what you want at this stage! The flour absorbs the fats, getting us one step closer to the iconic Homemade Cheeze-Its texture.
Step 3: Bring the Dough Together
With the processor running, drizzle in the ice water, one tablespoon at a time. Keep pulsing until the dough begins to pull away from the sides and come together into a soft ball. If it looks dry, add another spoonful of water. This method keeps your dough tender yet not sticky—a must for cracker success.
Step 4: Chill the Dough
Shape your dough into a flat disc, wrap it tightly in plastic wrap, and let it rest in the fridge for at least an hour. This chill time firms up the dough, making it much easier to roll and cut, and is the secret to those crisp, flaky Homemade Cheeze-Its.
Step 5: Roll and Cut
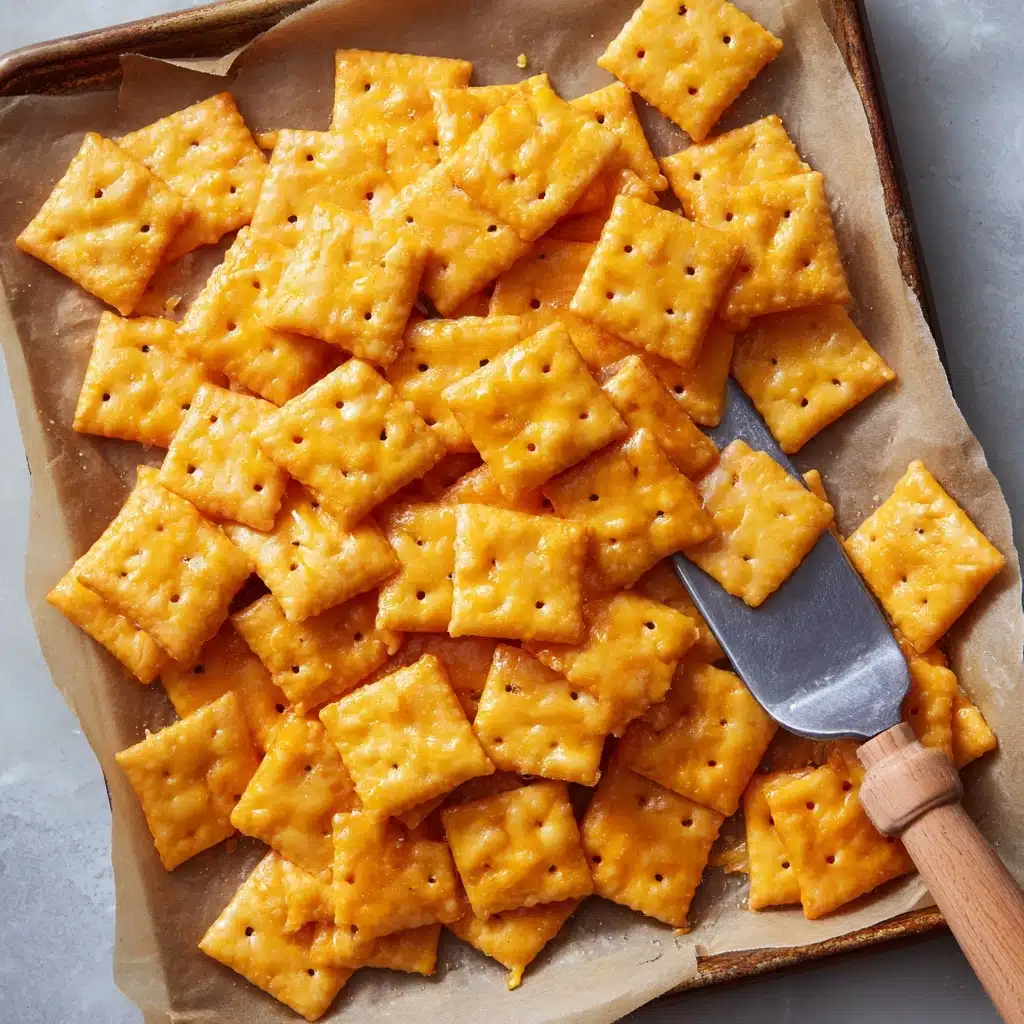
After the dough is cold, preheat your oven to 350°F and line a baking sheet with parchment paper. Cut the dough in half, and roll each piece out on a floured surface to about 1/8 to 1/4 inch thick. Use a sharp knife or pastry cutter to slice into 1-inch squares—don’t worry if they’re not perfect, that’s part of their charm. Poke a tiny hole in the center of each square with a skewer or toothpick, just like the originals.
Step 6: Bake Until Golden
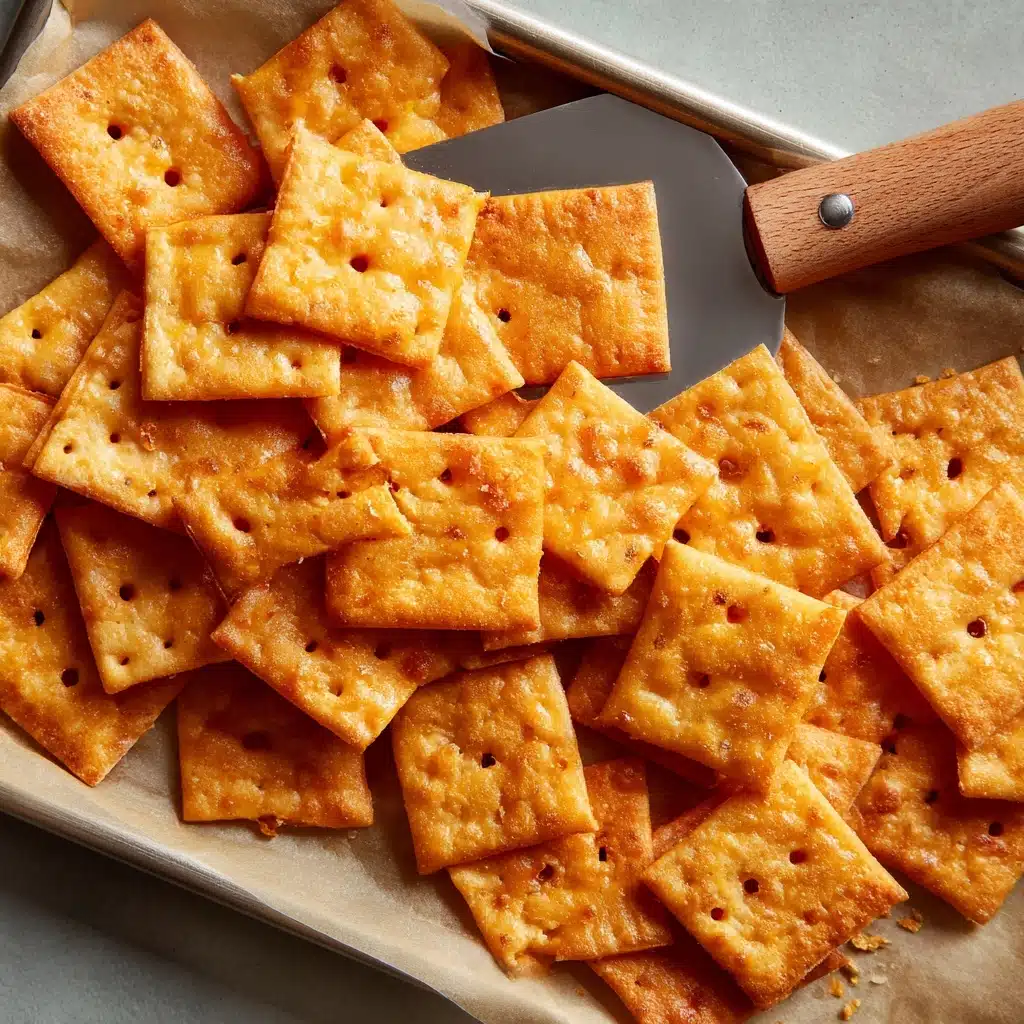
Arrange your squares with a little space between them on the prepared baking sheet. Bake for 12 to 16 minutes, keeping a close eye as you want them crisp and lightly golden at the edges. The irresistible aroma will fill your kitchen, letting you know Homemade Cheeze-Its are nearly ready for snacking.
Step 7: Cool and Enjoy
Let the crackers cool completely on the baking sheet to finish crisping up. Once cooled, transfer your Homemade Cheeze-Its to an airtight container—or better yet, enjoy them right away while they’re at their crunchiest!
How to Serve Homemade Cheeze-Its
Garnishes
A simple sprinkle of flaky sea salt or a dusting of smoked paprika just before baking can elevate your Homemade Cheeze-Its to gourmet status. For a little extra warmth, a pinch of cayenne pepper added before baking brings a delightful kick!
Side Dishes
Pair these crispy crackers with a steaming bowl of tomato soup, serve alongside a vibrant cheese platter, or add them to a lunchbox next to crisp veggies and hummus. Homemade Cheeze-Its are also fantastic with your favorite dips—think herby cream cheese or spicy salsa—for an easy appetizer everyone will love.
Creative Ways to Present
Package a batch in a festive tin or glass jar for a homemade gift, toss them into a snack mix with nuts and pretzels, or serve in mini paper cones at a picnic for a playful touch. However you present them, these crackers are sure to be the star of any snack spread!
Make Ahead and Storage
Storing Leftovers
Once completely cooled, keep your Homemade Cheeze-Its in an airtight container at room temperature. They’ll stay fabulously crisp for up to a week—though good luck making them last that long!
Freezing
If you’d like to prep ahead, freeze unbaked dough discs wrapped tightly in plastic and then in foil. Thaw overnight in the refrigerator when ready to bake. You can also freeze the baked crackers in a zip-top bag for up to two months, but expect a little loss of crunch.
Reheating
To revive that fresh-baked crispiness, pop leftover Homemade Cheeze-Its on a baking sheet in a 325°F oven for 4 to 6 minutes. Let them cool a bit before crunching in—this simple step brings them right back to just-out-of-the-oven perfection.
FAQs
Can I use a different type of cheese?
Absolutely! While sharp cheddar is the classic choice for Homemade Cheeze-Its, you can experiment with other hard cheeses like pepper jack, Colby, or even Parmesan for a tasty twist.
What if I don’t have a food processor?
You can make the dough by hand! Use a pastry blender or two forks to work the butter and cheese into the dry ingredients, then knead gently until everything comes together.
How do I keep the crackers crispy?
Be sure to bake the crackers until they’re golden at the edges and let them cool completely before storing. If they soften over time, a quick stint in the oven will restore their crunch.
Can I make these gluten-free?
Yes! Substitute your favorite gluten-free all-purpose flour blend. The texture will be slightly different, but the flavor will still shine through.
Can I double or halve the recipe?
Definitely. Homemade Cheeze-Its scale up or down beautifully. Just be sure not to overcrowd your baking sheets so they all crisp up evenly.
Final Thoughts
There’s something deeply satisfying about pulling a tray of fresh, golden Homemade Cheeze-Its from your own oven—you’re in for a cheesy treat that outshines anything from the snack aisle! Go ahead, give this recipe a whirl, and let your kitchen be filled with the aroma (and sound!) of crunchy, irresistible goodness. You’ll never go back to the boxed kind again.
PrintHomemade Cheeze-Its Recipe

Learn how to make delicious Homemade Cheeze-Its that are better than store-bought, with sharp cheddar and a hint of garlic. These savory crackers are perfect for snacking!
- Prep Time: 15 minutes
- Cook Time: 15 minutes
- Total Time: 1 hour 45 minutes
- Yield: About 8 servings 1x
- Category: Snack
- Method: Baking
- Cuisine: American
- Diet: Vegetarian
Ingredients
Cheese Mixture:
- 8 ounces shredded sharp cheddar cheese
- 4 tablespoons (½ stick) salted butter, softened
- ½ teaspoon seasoning salt
- ½ teaspoon garlic powder
Dough:
- 1 cup all-purpose flour, spooned and leveled
- 2–3 tablespoons ice water
Instructions
- Cheese Mixture: In a food processor or blender, pulse the shredded cheddar cheese, softened butter, seasoning salt, and garlic powder until the mixture is crumbly.
- Dough: Add the flour and pulse until the dough resembles coarse sand. Drizzle in the ice water, one tablespoon at a time, and continue pulsing until the dough begins to form a ball. Add 1 more tablespoon of water if needed.
- Transfer the dough to a sheet of plastic wrap, shape it into a disc, wrap tightly, and refrigerate for at least one hour.
- Preheat the oven to 350 degrees Fahrenheit and line a baking sheet with parchment paper.
- Cut dough in half and roll out each half of the chilled dough on a lightly floured surface to about ⅛-¼ inch thick.
- Use a sharp knife or a pastry cutter to cut the dough into small squares, approximately 1 inch in size.
- Use the tip of a skewer or a toothpick to poke a hole in the center of each square.
- Arrange the squares on the prepared baking sheet, leaving a small space between each piece.
- Bake for 12-16 minutes, or until the crackers are crisp and lightly golden around the edges.
- Remove from the oven and let cool completely on the baking sheet before serving or storing in an airtight container.
Notes
- For extra flavor, you can experiment with different seasonings like paprika, cayenne pepper, or even ranch seasoning.
- Make sure the dough is well-chilled before rolling it out for easier handling.
Nutrition
- Serving Size: 1 serving (approx. 30g)
- Calories: 140
- Sugar: 0.5g
- Sodium: 180mg
- Fat: 10g
- Saturated Fat: 6g
- Unsaturated Fat: 3g
- Trans Fat: 0g
- Carbohydrates: 7g
- Fiber: 0.3g
- Protein: 5g
- Cholesterol: 25mg
Keywords: Cheese crackers, Homemade snacks, Cheddar cheese recipes


