
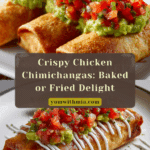
Chicken Chimichangas Recipe
If there’s one recipe that captures pure comfort, crunch, and bold flavor in one gorgeous golden package, it’s Chicken Chimichangas. This Tex-Mex favorite is a celebration of tender chicken, aromatic spices, gooey cheese, and crispy tortilla — all finished with your favorite toppings. Whether you go for the classic fried version or a lighter baked approach, Chicken Chimichangas are impossible not to love. Perfect for weeknights, parties, or a cozy weekend indulgence, this dish never fails to bring smiles to the table.
Ingredients You’ll Need
Ready to make magic happen in your kitchen? The ingredient list is refreshingly simple, but each component plays an essential role in making Chicken Chimichangas sing. Let’s break down what you’ll use and why it matters.
- Vegetable Oil: The secret to a golden, crispy exterior — essential for frying, and useful for sautéing the flavorful filling.
- White Onion: Adds sweetness and depth to the filling as it sautés, forming the base flavor.
- Minced Garlic: Bringing a wonderful aromatic kick, garlic is the heart of so many savory dishes, including this one.
- Chili Powder: Provides a mild heat and earthy flavor, giving the chicken mixture its signature Tex-Mex vibe.
- Oregano: Just a touch offers a subtle, herbal brightness to round out the spices.
- Ground Cumin: Adds warmth and complexity, perfectly complementing the chili powder and chicken.
- Cooked, Shredded Chicken: Rotisserie chicken makes this recipe a breeze — it’s perfectly tender and soaks up all the flavors.
- Salt and Pepper: Seasoning the filling just right makes all the difference — taste as you go!
- Diced Green Chilies: A pop of tangy heat and color, these little chilies add Tex-Mex flair.
- Burrito-size Flour Tortillas: The perfect canvas for your filling — choose soft, pliable tortillas to make rolling easy.
- Shredded Monterey Jack Cheese: Melts beautifully and adds that luscious cheesiness that makes every bite irresistible.
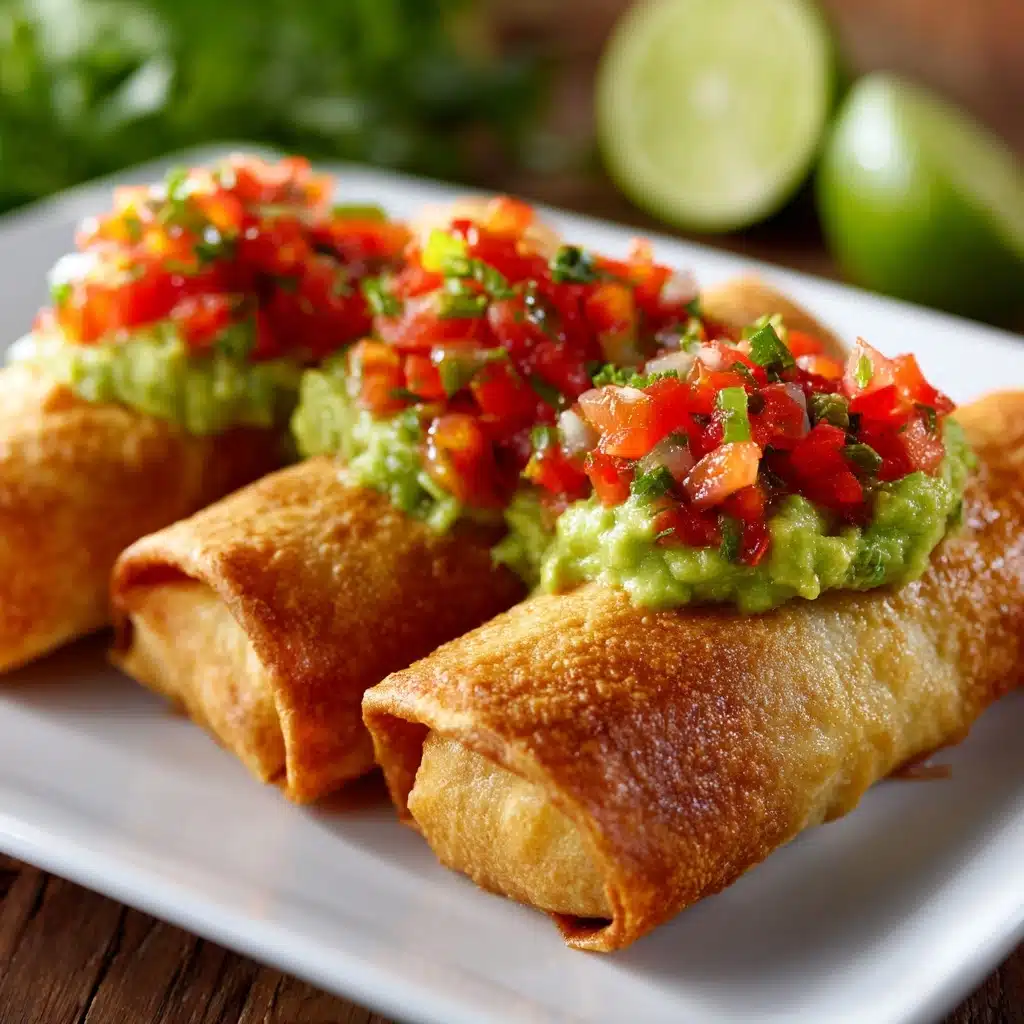
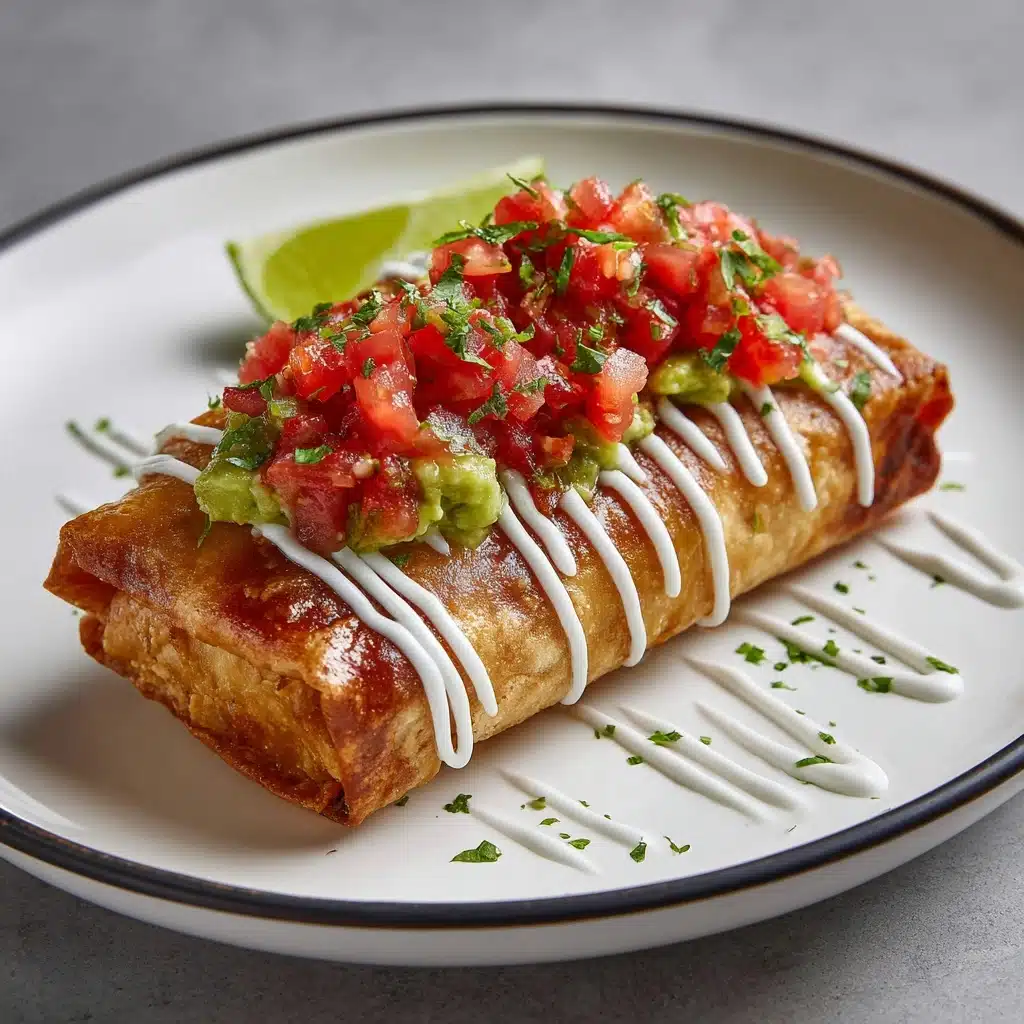
- Your Favorite Toppings (salsa, sour cream, guacamole, pico, lettuce): The crowning glory — customize to your liking for freshness and fun.
How to Make Chicken Chimichangas
Step 1: Prepare Your Cooking Method
If you’re frying, fill a large, heavy-bottom skillet with about 2 inches of vegetable oil and start it over low heat so it can slowly reach 375 degrees F. If you’re baking, preheat your oven to 375 degrees F and grease a large baking sheet with nonstick spray. Getting your cooking method set up first makes the rest of the process smooth and stress-free.
Step 2: Cook the Chicken Filling
Heat 2 tablespoons of vegetable oil in a large skillet over medium-high heat. Add the diced onion and cook until it just begins to soften and turn fragrant. Stir in the minced garlic, chili powder, oregano, and cumin. Let these spices bloom for about a minute — you want to smell their magic! Mix in the shredded chicken, salt, pepper, and diced green chilies. Continue stirring until everything is combined and hot, about 5 more minutes. Set aside; you’re building layers of flavor here!
Step 3: Fill and Roll the Chimichangas
Warm your tortillas to make them supple (a quick zap in the microwave is perfect). Spoon about half a cup of that beautiful chicken mixture into the center of each tortilla. Top with around three tablespoons of shredded Monterey Jack cheese. Fold in the sides, then bring the bottom up over the filling, and roll it up tightly like a burrito. Place seam-side down on a platter. Repeat for all your tortillas — they’re looking good already!
Step 4: Cook the Chimichangas (Fried or Baked)
For fried Chicken Chimichangas: Working one at a time, carefully lower each rolled tortilla into the hot oil, seam side down. Hold them with tongs for a moment to help seal, and fry until both sides are golden and crispy, about 1-2 minutes total. Remove to a paper towel-lined plate to soak up extra oil.
For baked Chicken Chimichangas: Arrange the filled tortillas on your greased baking sheet, seam side down. Give the tops a quick mist with non-stick spray. Bake for 20 to 30 minutes or until they’re beautifully golden and crisped.
Step 5: Add Toppings and Serve
Right before serving, pile on your favorite toppings. Salsa, sour cream, guacamole, lettuce, or pico de gallo each gives these Chicken Chimichangas a fresh, bright counterpoint to their rich filling and crisp exterior. Enjoy the crunchy, gooey, savory perfection!
How to Serve Chicken Chimichangas
Garnishes
When it comes to garnishing Chicken Chimichangas, the sky is the limit. Classic salsa adds zesty brightness, while creamy sour cream and guacamole create luscious contrast. Sprinkle shredded lettuce or a handful of fresh cilantro for coolness and color. Don’t forget chopped tomatoes or pico de gallo — you’ll love how these fresh toppings balance the richness of the chimichangas.
Side Dishes
Consider serving your Chicken Chimichangas with always-welcome Mexican rice, cilantro-lime rice, or your favorite beans (refried or black beans work beautifully). Chips and salsa, Mexican street corn, or a crunchy slaw are all fantastic alongside. These flavorful sides round out the meal and soak up any delicious filling that escapes your chimichangas!
Creative Ways to Present
For extra flair, set up a “build-your-own” Chicken Chimichanga bar where everyone can add their favorite toppings. Want to wow guests? Slice each chimichanga in half at an angle and stack on a platter with all the fixings. Or top each chimichanga with a ladle of warm queso and a sprinkle of fresh jalapeños for a modern, party-ready twist.
Make Ahead and Storage
Storing Leftovers
If you have leftover Chicken Chimichangas, wrap them individually in foil or plastic wrap once they’ve cooled slightly. Store in an airtight container in the refrigerator, and they’ll keep well for up to 3 days. They make a delicious, quick meal or satisfying snack the next day!
Freezing
Chicken Chimichangas freeze beautifully! Let them cool completely, then wrap tightly in foil and place in a freezer-safe bag or container. Label and freeze for up to 2 months. This is a fantastic meal-prep trick, ensuring you have a crave-worthy meal ready to go whenever you need it.
Reheating
To reheat, bake chilled or thawed Chicken Chimichangas in a 350 degree F oven until heated through and crispy again, about 15–20 minutes. For frozen chimichangas, it helps to unwrap them so the tortilla crisps up. The microwave works for a quick zap, but the oven is best for keeping that signature crunch.
FAQs
Can I use corn tortillas instead of flour?
Flour tortillas are traditional for Chicken Chimichangas because they’re soft, flexible, and create that classic golden crunch. Corn tortillas tend to crack and won’t roll up as well — but if you’re gluten-free and feeling adventurous, you can experiment (though results may vary).
How do I make these vegetarian?
Absolutely! Swap the chicken for sautéed mushrooms, black beans, or a blend of roasted veggies and continue with the recipe as written. Monterey Jack cheese and all your favorite toppings will still shine.
Is it possible to make Chicken Chimichangas healthier?
Yes! Opt for the baked version instead of fried, use whole wheat tortillas, and load up on fresh veggie toppings. Rotisserie chicken breast is lower in fat, and you can even reduce the cheese if you wish.
Can I prepare these ahead for a party?
Definitely! Assemble your Chicken Chimichangas, cover tightly, and store in the fridge up to 12 hours before cooking. When ready to serve, just fry or bake as instructed so they’re hot and crisp for your guests.
What other cheeses work well in Chicken Chimichangas?
Besides Monterey Jack, you can try cheddar, pepper jack for added spice, or even a Mexican cheese blend. The key is picking a cheese that melts smoothly and adds a creamy layer to each bite.
Final Thoughts
It’s impossible not to fall in love with the crispy, cheesy, flavor-packed bite of homemade Chicken Chimichangas. Whether baked, fried, dressed up with toppings, or kept simple, they’re something you’ll come back to again and again. Pull out your skillet, gather your ingredients, and get ready to wow yourself and everyone around your table with this absolute Tex-Mex classic!
PrintChicken Chimichangas Recipe

These Chicken Chimichangas are a delicious Tex-Mex favorite that can be fried or baked to crispy perfection. Packed with seasoned shredded chicken and gooey cheese, they are perfect for a flavorful dinner the whole family will love.
- Prep Time: 20 minutes
- Cook Time: 30 minutes
- Total Time: 50 minutes
- Yield: 8 chimichangas 1x
- Category: Main Course
- Method: Frying, Baking
- Cuisine: Tex-Mex
- Diet: Vegetarian
Ingredients
Chicken Filling
- 1/2 cup diced white onion
- 2 teaspoons minced garlic
- 1/2 Tablespoon chili powder
- 1/4 teaspoon oregano
- 1/2 teaspoon ground cumin
- 4 cups cooked, shredded chicken
- 1 teaspoon salt
- 1/2 teaspoon pepper
- 1 can (4 ounces) diced green chilies
Additional Ingredients
- 1 to 2 cups vegetable oil, divided
- 8 (burrito-size) flour tortillas, warmed
- 2 cups shredded Monterey Jack cheese
- Toppings: salsa, sour cream, guacamole, pico, lettuce, etc.
Instructions
- Chicken Filling: In a skillet, sauté onion, garlic, spices, and chicken. Add green chilies and cook until heated through.
- Assembly: Fill tortillas with chicken mixture and cheese. Roll up and secure.
- Fried Version: Fry chimichangas in hot oil until golden brown.
- Baked Version: Bake chimichangas until crispy.
- Serve warm with toppings of choice.
Nutrition
- Serving Size: 1 chimichanga
- Calories: 385
- Sugar: 2g
- Sodium: 640mg
- Fat: 20g
- Saturated Fat: 8g
- Unsaturated Fat: 9g
- Trans Fat: 0g
- Carbohydrates: 22g
- Fiber: 2g
- Protein: 27g
- Cholesterol: 82mg
Keywords: Chicken Chimichangas, Tex-Mex, Fried, Baked, Mexican, Dinner
