
Banana Sushi Recipe
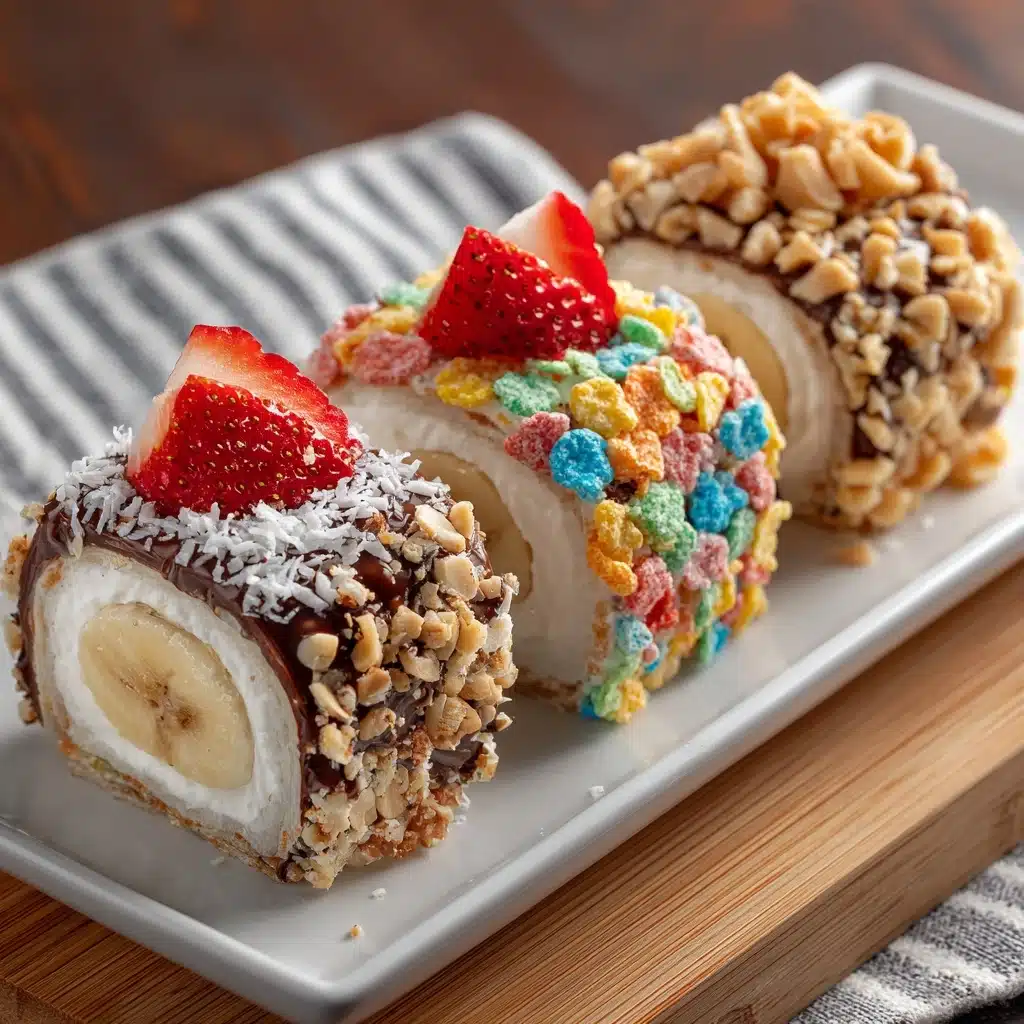
If you’re in the mood for a playful, no-bake treat that looks fancy but couldn’t be easier, you have to try Banana Sushi. This delightful snack combines creamy spreads, fresh bananas, and all sorts of crunchy or fruity toppings, all rolled up in a soft tortilla. It’s the sweetest way to jazz up snack time, kid’s lunches, or your next brunch party — and I’ll show you just how effortless it is to make this eye-catching dish.
Ingredients You’ll Need
The joy of Banana Sushi is that you only need a handful of simple ingredients, but each one brings flavor, texture, or a pop of color. Choose your favorite flavor combination to match your mood, or mix and match for a stunning platter.
- Flour Tortilla: This acts as your “sushi rice” and holds everything together. Gluten-free tortillas also work beautifully!
- Ripe Banana: A banana that’s yellow with no (or very few) brown spots works best for easy rolling and firm slices.
- Peanut Butter: For that classic nutty creaminess; natural or regular varieties both work.
- Chopped Peanuts: Sprinkle on top for crunch and an extra hit of peanut flavor.
- Cream Cheese: Use softened cream cheese for effortless spreading and a subtly tangy base if you’re making the strawberries and cream version.
- Fresh Strawberries: Thin slices layered inside make every bite fresh, fruity, and vibrant.
- Crushed Freeze-Dried Strawberries: Adds a tart crunch and gorgeous color on top.
- Nutella: For all the chocolate-hazelnut lovers, use this spread for pure decadence.
- Shredded Coconut: A sprinkle lends tropical sweetness, chewiness, and visual flair.
How to Make Banana Sushi
Step 1: Prep Your Base
Start by laying a flour tortilla flat on a cutting board. This is your canvas! Make sure it’s at room temperature — cold tortillas will be less pliable and might tear when you roll them.
Step 2: Spread the Love
With a butter knife or small offset spatula, evenly spread 2 tablespoons of your chosen filling (peanut butter, cream cheese, or Nutella) over the entire surface of the tortilla. Cover the edges right up to the rim for even flavor in every bite.
Step 3: Add the Banana
Place a peeled, ripe banana at one end of the tortilla. If your banana is especially curved, you might need to gently straighten it for easier rolling. Don’t stress about small cracks — the filling will hold it together just fine!
Step 4: Roll It Up
Carefully roll the tortilla around the banana, starting from the end where you placed it. Think of wrapping a sleeping bag or sushi roll: keep it snug so everything holds together, but not so tight it squishes the banana.
Step 5: Finish and Top
With the seam side down, spread the remaining tablespoon of your filling evenly over the top of the rolled tortilla. This creates a sticky “glue” for whatever crunchy or colorful topping you choose: chopped peanuts, freeze-dried strawberries, or shredded coconut.
Step 6: Slice and Serve
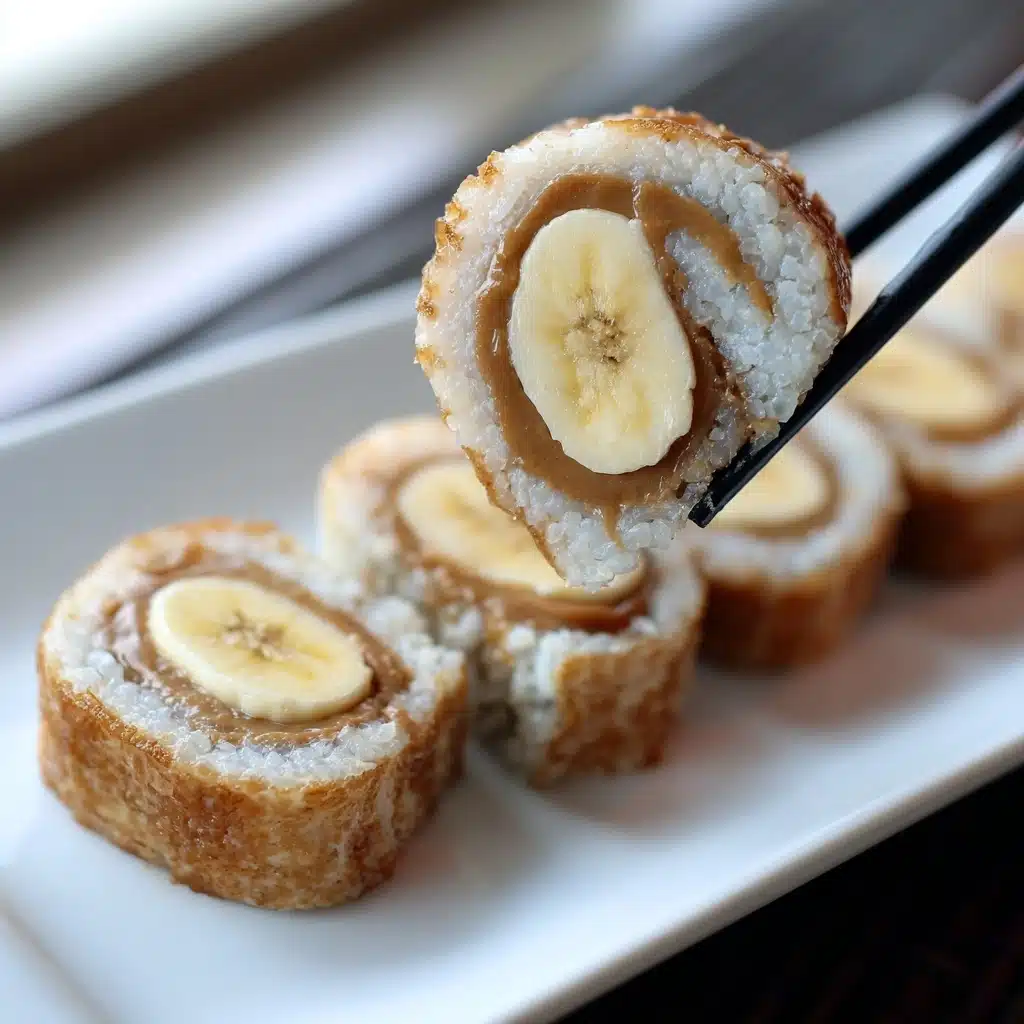
Use a sharp, non-serrated knife to slice the roll into 1-inch rounds, revealing the beautiful spiral inside. Arrange the banana sushi on a platter, and don’t forget the chopsticks if you want to lean into the sushi experience!
How to Serve Banana Sushi
Garnishes
The garnish is where you can really make your Banana Sushi pop. Sprinkle with extra chopped nuts, a dusting of cinnamon, chocolate chips, or even a hibiscus powder for a fun twist. A drizzle of honey or melted chocolate bumps up the wow factor instantly.
Side Dishes
Banana Sushi is a showstopper on brunch platters, especially alongside fresh fruit, yogurt parfaits, or a handful of berries. For a party spread, pair it with mini pancakes, granola bars, or even a small smoothie shot for a healthy, playful touch.
Creative Ways to Present
Go beyond the basic plate: weave Banana Sushi onto skewers for a party snack, stack the pieces into a “sushi tower,” or serve three or more varieties on a colorful tray for a festive, mix-and-match vibe. Mini bento boxes turn Banana Sushi into a magical lunchbox surprise.
Make Ahead and Storage
Storing Leftovers
If you’ve got leftover Banana Sushi, store it in an airtight container in the refrigerator. It’s best enjoyed within 24 hours to keep the banana firm and the tortilla soft, but you can safely snack on it for up to two days. Keep toppings separate if you want to preserve extra crunch.
Freezing
While freezing Banana Sushi is possible, it does change the texture a bit. If you do want to freeze, wrap the unsliced rolls tightly in plastic wrap and foil, and freeze for up to a month. Thaw in the fridge before slicing, and wait to add fresh garnishes until right before serving.
Reheating
No reheating is needed for Banana Sushi — in fact, it’s meant to be served chilled or at room temperature. If you’ve frozen the rolls, just bring them to fridge temperature and slice before serving. For the best flavor, avoid microwaving, which can make the banana too mushy.
FAQs
What type of tortilla works best for Banana Sushi?
A soft, taco-size flour tortilla is ideal since it’s pliable and provides the right amount of chew. Gluten-free alternatives, such as almond or cassava flour tortillas, also roll up well—you might just need to warm them slightly first.
Can I make Banana Sushi nut-free?
Absolutely! Try using sunflower seed butter, cookie butter, or plain cream cheese in place of peanut butter or Nutella. Skip the nut toppings and choose seeds, granola, or even mini chocolate chips instead.
Do I have to serve Banana Sushi with chopsticks?
Not at all—it’s purely for fun! Banana Sushi is easily eaten with your hands, though chopsticks do add a charming, playful twist if you’re serving at a party or to kids who like a challenge.
What other fillings can I try in Banana Sushi?
So many! From almond butter and honey, to Greek yogurt and berries, or even mascarpone with a sprinkle of cocoa powder—the options are endless. Let your taste buds lead the way and use whatever spreads and toppings you love most.
Can I pack Banana Sushi in a lunchbox?
Yes, with a small tip: after rolling and slicing, wrap the Banana Sushi pieces snugly in parchment or keep them separated in a lunch container to prevent sogginess. A little lemon juice on the banana can also help prevent browning if you’re making them ahead for later in the day.
Final Thoughts
I hope you’re as excited as I am to make Banana Sushi part of your snack and dessert rotation. These playful rolls are seriously simple, endlessly customizable, and always a crowd-pleaser—so grab your bananas, spread of choice, and favorite toppings, and start rolling!
PrintBanana Sushi Recipe

Banana Sushi is a fun and creative twist on traditional sushi. These sweet treats are perfect for a snack or dessert, offering a delightful combination of flavors and textures.
- Prep Time: 15 minutes
- Cook Time: 0 minutes
- Total Time: 15 minutes
- Yield: Varies
- Category: Snack/Dessert
- Method: Rolling
- Cuisine: Fusion
- Diet: Vegetarian
Ingredients
Peanut Butter Banana Sushi
- 1 taco-size flour tortilla (gluten-free tortillas work great, too!)
- 1 ripe but firm banana, peeled
- 3 tablespoons peanut butter, divided
- ½ cup chopped peanuts
Strawberries and Cream Banana Sushi
- 1 taco-size flour tortilla (gluten-free tortillas work great, too!)
- 1 ripe but firm banana, peeled
- 3 tablespoons softened cream cheese, divided
- 2 strawberries, thinly sliced
- 2 tablespoons crushed freeze-dried strawberries
Chocolate Coconut Banana Sushi
- 1 taco-size flour tortilla (gluten-free tortillas work great, too!)
- 1 ripe but firm banana, peeled
- 3 tablespoons Nutella, divided
- 2 tablespoons shredded coconut
Instructions
- Lay out the tortilla: Lay one of the tortillas flat on a cutting board, and spread 2 tablespoons of the peanut butter, cream cheese, or Nutella evenly over the top.
- Add the banana: Place the banana at the end of the tortilla. If the banana is very curved, you might need to straighten it out a bit (don’t worry if it cracks some).
- Roll it up: Roll the banana in the tortilla snugly—like you are rolling someone up snug in a rug! Place the tortilla seam-side-down onto the cutting board.
- Top it off: Take the remaining tablespoon of peanut butter, cream cheese, or Nutella, and spread it evenly over the top of the tortilla roll. Sprinkle the top of the roll with chopped peanuts, freeze-dried strawberries, or shredded coconut.
- Slice and serve: Slice the roll into 1-inch sushi rolls. Plate with chopsticks for added fun!
Nutrition
- Serving Size: 1 sushi roll
- Calories: Varies
- Sugar: Varies
- Sodium: Varies
- Fat: Varies
- Saturated Fat: Varies
- Unsaturated Fat: Varies
- Trans Fat: 0g
- Carbohydrates: Varies
- Fiber: Varies
- Protein: Varies
- Cholesterol: Varies
Keywords: banana sushi, sweet sushi, dessert sushi, creative snacks