
Oreo Cake Pops Recipe
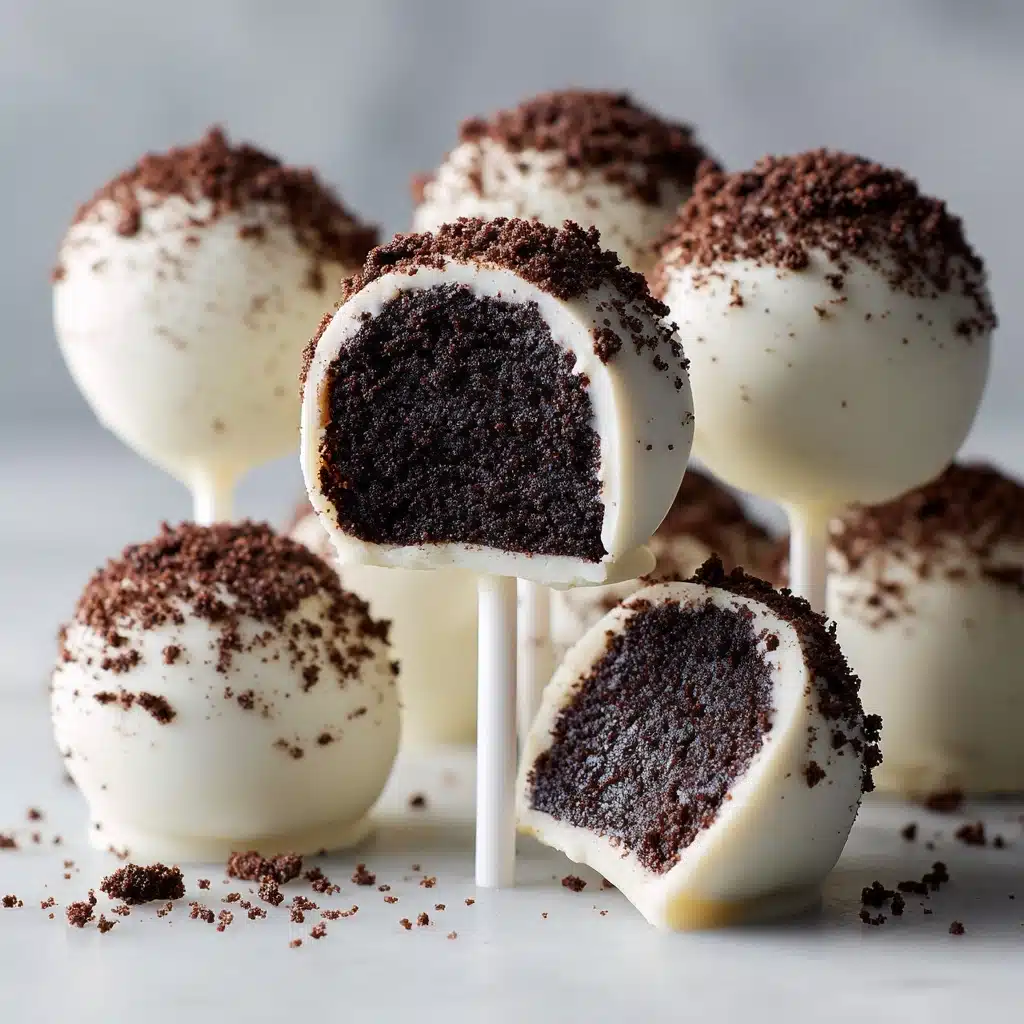
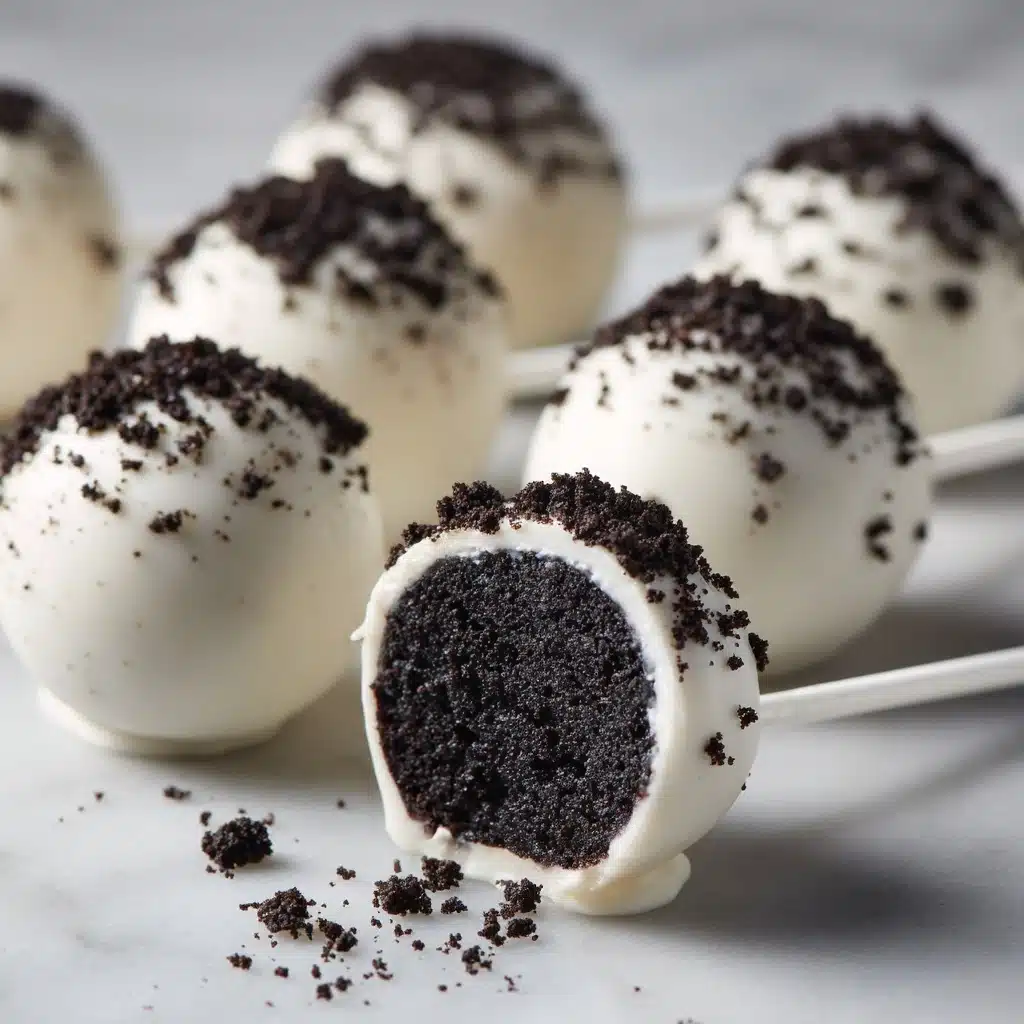
If you’re looking for an irresistibly delightful treat that brings out your inner kid, Oreo Cake Pops are about to become your next obsession. These charming little bites deliver everything you crave in a dessert: a creamy, chocolatey center surrounded by a crisp candy shell, all topped off with a shower of sprinkles. Whether you’re planning a party, searching for a homemade gift, or simply want a fun kitchen adventure, Oreo Cake Pops are playful, no-bake, and always a hit with both adults and kids. They’re easy enough for beginners, yet fancy enough to steal the show at any celebration.
Ingredients You’ll Need
The beauty of Oreo Cake Pops is in their simplicity. With just a handful of ingredients, you get a dessert that’s rich, creamy, and full of delightful textures. Each component has a unique role in creating that unmistakable Oreo Cake Pop magic.
- Oreo cookies: Use 48 classic Oreos (not Double Stuf!) for the perfect crumbly base and that signature cookies-and-cream flavor.
- Cream cheese: An 8oz block, softened, binds the crumbs together and adds a luscious, tangy richness to the pops.
- Candy melts (vanilla or chocolate): About 1 1/2 bags create a smooth coating that hardens perfectly for that signature snap.
- Shortening or oil: Just 1 1/2 teaspoons helps thin the melted candy, making it easy to dip and giving a silky finish.
- Sprinkles (optional): For an extra pop of color and crunch, choose your favorite sprinkles to decorate with a flourish.
How to Make Oreo Cake Pops
Step 1: Crush the Oreos
Place your Oreos (cream filling included) into a food processor and pulse them into fine crumbs. This step is the secret behind the cake-like texture of your Oreo Cake Pops, giving them structure and rich cocoa flavor all at once. If you don’t have a food processor, a zip-top bag and a rolling pin will do the trick — just make sure the crumbs are fine and even.
Step 2: Mix in Cream Cheese
Transfer all those gorgeous cookie crumbs into a stand mixer fitted with a paddle, or into a mixing bowl with a hand mixer. Add the room-temperature cream cheese, then blend until the mixture comes together in a thick, sticky dough. You’ll know you’re done when the dough pulls away from the sides of the bowl. This creamy, chocolatey blend is what takes these treats over the top!
Step 3: Shape and Chill the Balls
Scoop out heaping tablespoons of the Oreo-cream cheese mixture and roll them gently into 1 1/2-inch balls. Set each one on a parchment-lined baking sheet. Once you’ve shaped them all, pop the tray in the freezer for about 30 minutes, or in the fridge for an hour. This quick chill is crucial for making the balls firm enough to dip easily without falling apart.
Step 4: Melt the Candy Coating
Pour your candy melts into a microwave-safe bowl, and heat in 30-second bursts, stirring after each interval, until fully melted and smooth. Stir in the shortening or oil gradually; this thins the coating so your Oreo Cake Pops get a flawless, even layer. If the coating feels too thick, add a little more oil until it glides off the spoon in silky ribbons.
Step 5: Dip and Insert the Sticks
Take each chilled ball and dip it into the melted candy coating, rolling gently to cover completely. Dip the tip of a cake pop stick into the candy, then insert it partway into the cake pop center—this helps anchor the stick and keeps the pop secure. Acting quickly, let the excess drip off, then return the coated cake pop to your lined baking sheet or a cake pop stand if you prefer them without a flat base.
Step 6: Decorate!
Before that candy coating sets, sprinkle your cake pop with extra Oreo crumbs, colorful sprinkles, or both for an extra-special touch. The coating sets up fast, so have your sprinkles on hand and ready to go.
Step 7: Let Them Set
Allow the finished pops to rest until the coating is totally dry and snap-ready. You can place them on a stand, on a parchment-lined tray, or even stick them upright in a block of Styrofoam if you want perfectly round pops with no flat spots. Once dry, they’re ready to enjoy!
How to Serve Oreo Cake Pops
Garnishes
The garnish options for Oreo Cake Pops are truly endless! Try a dusting of fine Oreo crumbs for extra chocolate flavor, a drizzle of contrasting chocolate, or a playful scatter of colorful sprinkles. For a fancier touch, dip half the pop in white chocolate or add a pinch of edible glitter. Each bite-sized pop is your blank canvas!
Side Dishes
Pair Oreo Cake Pops with fresh strawberries or raspberries to add a burst of tartness that cuts through the richness. They’re also charming served alongside a glass of cold milk, hot coffee, or a scoop of vanilla ice cream. At parties, a platter of fresh fruit or a mini dessert sampler with other tiny treats creates a festive and indulgent spread.
Creative Ways to Present
Display your Oreo Cake Pops upright in a decorative mug, a vintage mason jar filled with colored sugar, or pressed gently into a Styrofoam block wrapped in tissue for a party-ready look. For gift-giving, wrap each pop in a clear treat bag tied with a ribbon. At birthday celebrations, arrange them on a tiered cake stand for an eye-catching centerpiece.
Make Ahead and Storage
Storing Leftovers
Store any leftover Oreo Cake Pops in an airtight container in the refrigerator. They’ll stay perfectly fresh and delicious for up to 5 days, making them great for prepping ahead or saving some for late-night cravings!
Freezing
For longer storage, you can freeze the finished cake pops. Arrange them in a single layer on a baking sheet, freeze until solid, then transfer to a freezer-safe container or zip-top bag. They’ll keep well for up to two months. Thaw in the refrigerator before serving for the best texture.
Reheating
Oreo Cake Pops are best served chilled or at room temperature—no reheating required! If you prefer to take the chill off, just leave them out at room temperature for 15-20 minutes before enjoying.
FAQs
Can I make Oreo Cake Pops without a food processor?
Absolutely! Place your Oreos in a sturdy zip-top bag and use a rolling pin to crush them into fine crumbs. It takes a bit more effort, but you’ll get delicious results just the same.
What’s the best way to get a smooth candy coating?
Thinning your candy melts with a touch of shortening or oil and working quickly is key! Make sure your cake balls are well-chilled before dipping and let any excess coating drip off while turning the pop gently.
Can I use flavored Oreos for this recipe?
Yes, flavored Oreos can add a fun twist, but make sure to avoid the Double Stuf varieties. Too much filling can make the pops tricky to shape and too soft to hold together.
Do I need a special cake pop stand?
No stand required—though they’re handy if you want round pops without a flat side! You can place the dipped pops on a parchment-lined tray to set, or use a block of Styrofoam, a colander, or even an upside-down cardboard box with holes poked in it.
What if my cake pops crack or split?
Cracking can happen if the cake balls are too cold and the coating is too hot. Let the balls sit at room temp for a few minutes after chilling before dipping, and make sure the candy coating isn’t too warm. These little adjustments can help prevent breaks.
Final Thoughts
If you’re searching for a treat that’s as easy as it is enchanting, you’ll fall in love with Oreo Cake Pops. They’re eye-catching, delicious, and fun to make, whether you’re crafting them for a party or a cozy night in. Give them a try and watch them disappear in a flash—you might want to make a double batch!
PrintOreo Cake Pops Recipe

Delicious and easy-to-make Oreo Cake Pops that are perfect for parties, dessert tables, or as a fun treat for any occasion.
- Prep Time: 45 minutes
- Cook Time: 0 minutes
- Total Time: 1 hour
- Yield: Makes about 24 cake pops 1x
- Category: Dessert
- Method: Mixing, Chilling, Dipping
- Cuisine: American
- Diet: Vegetarian
Ingredients
Oreo Cake Pops:
- 48 Oreo cookies (1 family sized bag)
- 1 8oz Block of cream cheese (softened to room temp)
Candy Coating:
- 1 1/2 Bag of vanilla or chocolate candy melts
- 1 1/2 Tsp shortening or oil (canola, vegetable, or olive oil)
- Sprinkles for decorating (optional)
Instructions
- Crush Oreos: In a food processor, blitz 48 Oreos (filling and all) until they are turned into crumbs.
- Mix Ingredients: Transfer the crumbs to a mixer, add the softened cream cheese, and mix until fully combined.
- Shape Balls: Roll the mixture into 1 1/2 inch balls and chill in the freezer for 30 minutes or in the fridge for an hour.
- Melt Candy Coating: Melt the candy melts in the microwave, adding shortening or oil to thin it out.
- Coat Cake Pops: Dip each ball into the melted candy, insert a stick, then decorate with Oreo crumbs and sprinkles.
- Set and Serve: Place the finished cake pops on a lined baking sheet to set before serving.
Notes
- For best results, use regular Oreos rather than double-stuffed for the right texture.
- Ensure the cream cheese is at room temperature for easy mixing.
- Decorate with sprinkles, crushed Oreos, or drizzled chocolate for a variety of looks.
Nutrition
- Serving Size: 1 cake pop
- Calories: 150
- Sugar: 12g
- Sodium: 90mg
- Fat: 8g
- Saturated Fat: 4g
- Unsaturated Fat: 2g
- Trans Fat: 0g
- Carbohydrates: 18g
- Fiber: 1g
- Protein: 2g
- Cholesterol: 10mg
Keywords: Oreo Cake Pops, Cake Pops Recipe, Oreo Dessert, Party Treats


